
Get branding tips and expert advice delivered straight to your inbox.
Updates to Collections: 6 Things You Need to Know
If you haven’t already noticed, we’re pretty pumped about what Collections can do to revolutionize your workflow. Collections can be used in so many versatile ways, including: granting certain audiences access to certain assets, managing specific marketing campaigns, or publicly embedding a subset of your Brandfolder.
Our dev team has been hard at work making Collections the best it can be. Today, we’re announcing six handy features that make your Collections act more like full-fledged Brandfolders — delivering more value and functionality to both you and your Brandfolder visitors.
1. Request Access for Collections
Eliminate back-and-forth communication by allowing public access to your private Collections. Once toggled on, new users can request access by entering their email address on the Collection’s page. This will email a link to the Brandfolder’s admin, where the admin can manage permissions for the requester. Additionally, you can even prompt the requester for additional information, like the reason why they’d like to access the Collection.
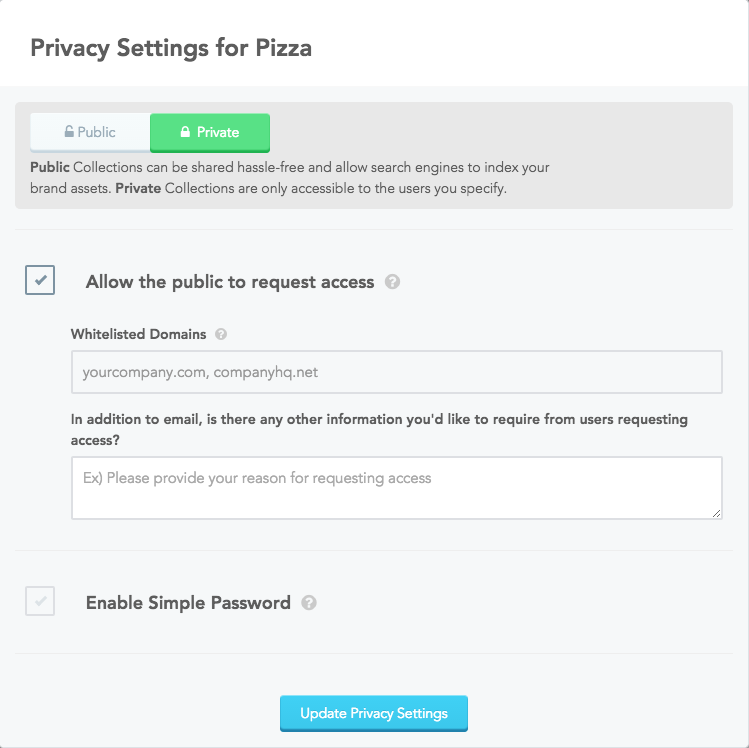
To activate this feature, simply navigate to your Collection’s privacy settings and check the box that says “Allow the public to request access.” Hit “Update Privacy Settings,” and you’re good to go! Now anyone who visits your Brandfolder can easily request access from your Brandfolder’s admin.
2. Domain Whitelisting for Collections
To streamline the “request access” process even more, you can also whitelist entire domains for access. This means that your Collection can automatically approve certain email addresses, bypassing the standard approval process altogether.
Here’s how it works: Requesters will still be promoted to enter their email address on the Collection’s page. However, if the email address entered is a whitelisted domain, the requester will instantly receive an email invitation to access the Brandfolder — no manual approval needed by the admin.
This is helpful if you’d like everyone at a certain company to easily access a private Collection. Hint: Don’t whitelist “gmail.com” unless you’d like (practically) everyone to see your Collection!
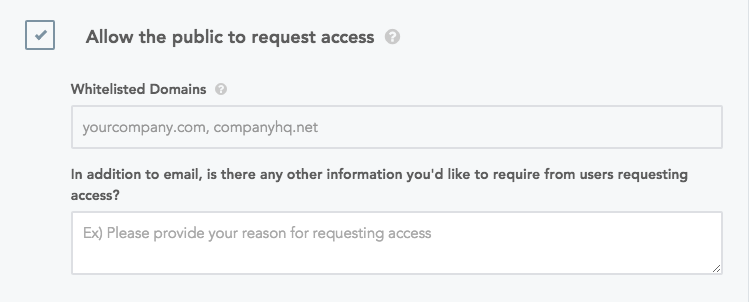
To whitelist a domain, simply add the domain under “Whitelisted Domains” in your Collection’s privacy settings.
3. Simple Password for Collections
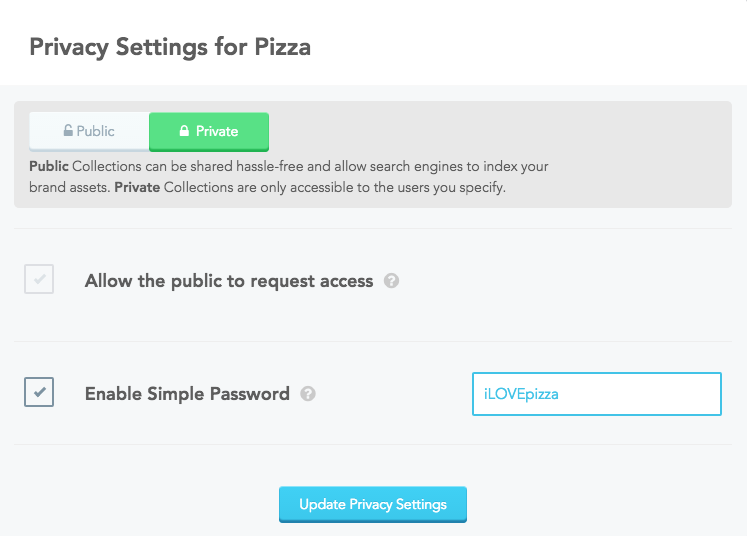
An alternative way to dole out access to your private Collection is to protect the Collection with a simple password. This will prompt the user to enter the Collection’s password before accessing its assets.
To enable a simple password for your Collection, navigate to your Collection’s privacy settings. Check the box that says “Enable Simple Password,” enter your desired password in the text box, and hit “Update Privacy Settings.”
4. Taglines for Collections
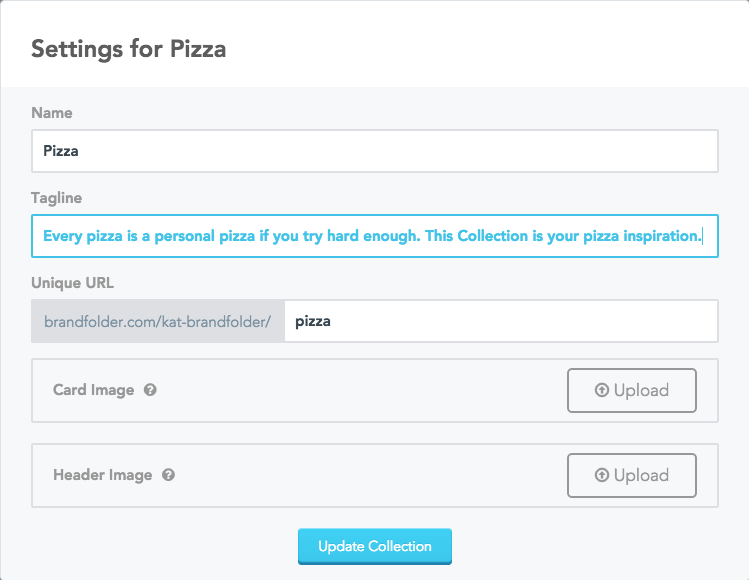
Now that we’ve got our security updates out of the way, let’s talk customization. Just like in your main Brandfolder, your Collection can now have a tagline of its own — making it even easier for your audience to understand what they’re viewing.
To add a tagline, navigate to your Collection’s basic settings, type your desired tagline in the text box, and hit “Update Collection.”
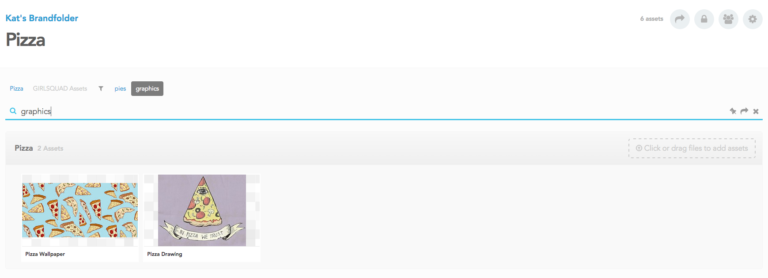
5. Pinned Tags for Collections
You can also create Pinned Tags for your Collection. Pinned Tags allow you to pin specific search words to the top of your Collections, making it super easy for your audience to find what they’re looking for.
To use this feature, navigate to your desired Collection and type your search query in the search bar. Hit enter, then click on the thumbtack icon on the right-hand side. Name your search query — this is what will appear on the top of your Collection. Click on “Pin Search,” and voilà! Your Collection has a new Pinned Tag.
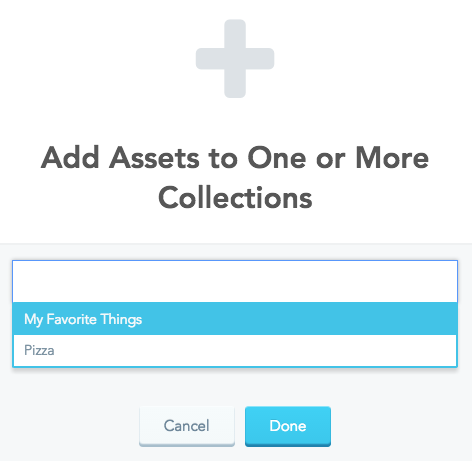
6. Add Assets to Multiple Collections
Last but not least, you can now add assets to multiple Collections at once. Once you’ve uploaded the assets to your Brandfolder, select the desired assets by clicking on the checkmarks on the bottom right corner. Then, click the “Add to Collection” icon on the bulk actions toolbar. Select the Collections that you’d like to add the assets to from the dropdown menu, and you’re all set!
So there you have it — six new ways to customize and secure your Collections. If you have any questions about utilizing these new features, send us a note at support@brandfolder.com. We’d love to hear how you’re using your Collections!
Interested in learning about how Collections (and our other features) can make your work life a whole lot easier? Click on the banner below to get in touch.