The Brand Consistency Checklist: How to Build Loyalty & Recognition
Use This Brand Consistency Checklist to Build Awareness & Customer Loyalty
Brand guidelines and brand consistency checklists give you clear processes that everybody in your organization can follow to maintain a cohesive aesthetic everywhere a customer interacts with your brand.
But creating a branding checklist for your teams to follow is only one half of what’s required to effectively uphold a consistent brand image: You also need the right tools to assist with accomplishing those checklist items.
Most teams start with digital asset management software.
Why? The best digital asset management (DAM) software out there is built to make brand consistency easier to accomplish and faster to maintain. The whole purpose of investing in a DAM — and upgrading from storage solutions like Google Drive and Box — is to improve the organization and accessibility of your approved, branded assets — think logos, brand colors, product images, sales collateral like decks and business cards, digital marketing materials like social media graphics, and so on.
In short, DAMs make it easier to maintain an updated asset library so everybody in the company uses the right branded materials. And some DAMs — like Brandfolder — are built with additional brand management features to make life even easier.
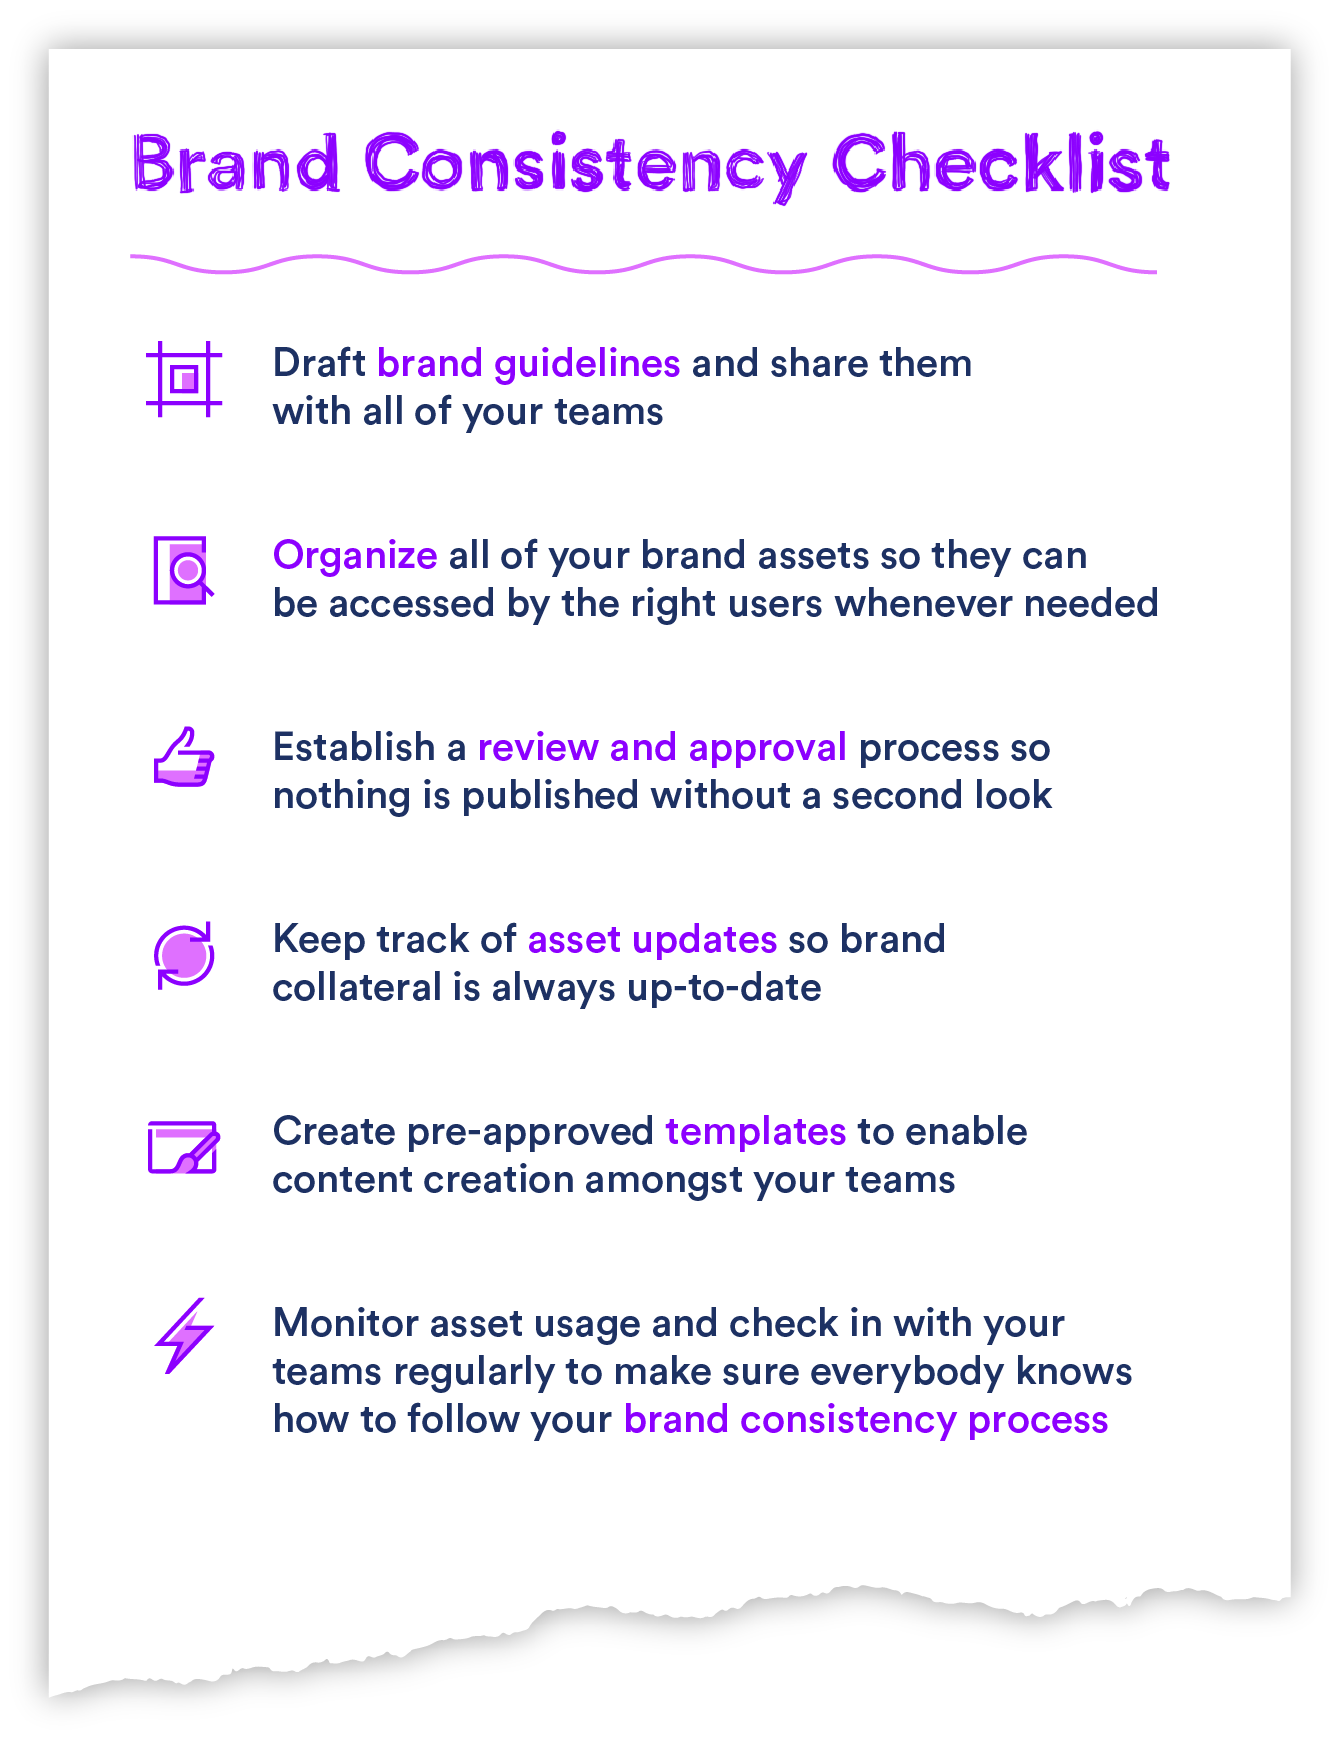
In this post, we go in-depth with each of our brand consistency checklist items and discuss how you can use Brandfolder to keep your whole team using on-brand digital assets:
With Brandfolder, you can store and organize all of your digital assets in one central, collaborative platform. Make approvals easier, put the right brand resources in the hands of the right people, never lose track of asset versions, and more. Sign up for a free demo of Brandfolder to see how simple brand management can be.
1. Draft & Share Brand Guidelines
Drafting and sharing brand guidelines is such a large undertaking that it feels wrong to list it as “Step 1” of a checklist. But if you want everyone in the company to stay “on brand,” then you have to define who your brand is, what you stand for and how you want to be represented among your target audience.
Serving-up brand guidelines involves more than just explaining how brand assets should be shared and distributed, it also entails spelling out every detail of your entire brand experience: your brand personality, brand values, brand voice, and everything else that plays into how people perceive your brand.
When drawing up your brand guidelines, ther are some must-haves we recommend including:
- Brand Overview: Define your brand story, including its history and vision for the future. Include more specifics about your brand identity by sharing your mission statement, brand promise, values, tagline or slogan and unique traits.
- Brand Strategy: List out your long-term goals and the brand’s plans to achieve them. You can even get as specific as drafting out strategies for different teams or different mediums, etc.
- Style Guide: Spell out all of the details regarding your visual identity, image style, and how your brand design elements, such as logos, color palettes, typography, should be displayed across print and web. Your style guide should also contain information about your communication style, including your brand’s tone of voice and messaging.
- Approval Process: Your brand guidelines should also outline your internal review/approval process (more on that below) so everybody is clear on the steps to take before distributing branded materials.
After you draw up your brand guidelines, you also have to share them so they’re accessible to everybody who needs to reference them.
How This Works in Brandfolder: Create a Brandguide for All of Your Users
Our Brandguide feature allows you to create shareable brand guidelines that are always up-to-date and accessible. Creating brand guidelines in Brandguide is easy, too, because our platform walks you through the process and allows you to embed images, videos, and other graphics straight from your asset library. You can control how your Brandguide is shared, and customize every aspect of your Brandguide to reflect the specifics of your brand design.
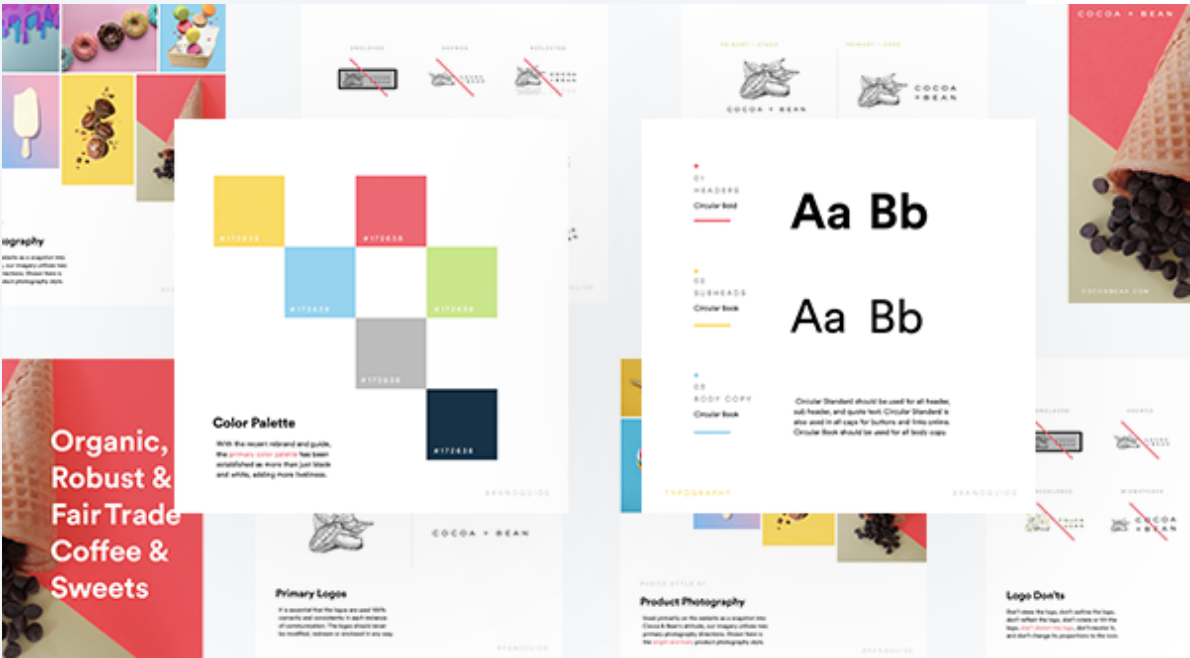
You can read more about Brandguide and see how easy it is to put together clean and clear brand guidelines and equip all of your teams with up-to-date branding information.
2. Centralize & Organize All Of Your Brand Assets
You also need to organize all of your up-to-date, approved assets and make sure they’re accessible to the right end users. That way everybody can access the assets they need and begin using them right away (without burdening creatives to approve every single deliverable).
Housing your brand’s content in an accessible repository allows teams to get on with their work without having to submit asset requests and wait around on approvals; and with that, it allows creatives the time to focus on other design projects.
How This Works in Brandfolder: Organize Assets in Brandfolders, Collections & Portals
We give teams a few ways to organize assets in Brandfolder, and our system for permissions allows you to get really specific with sharing without spending hours manually approving each person.
- You can create different Brandfolders to organize assets by brand or business. This is beneficial for marketing agencies who work with several brands and need to keep collateral for each brand separate.
- Within each Brandfolder, you can create Collections to organize groups of related or similar assets. There’s a lot of flexibility with how you can map your Collections and assets within, but we’ve seen teams organize assets for different audiences, products or services, marketing efforts and brand elements.
- You can also set up Brand Portals for different end users; that way, every team/department is only viewing the assets most relevant to them. Multinational brands with divisions around the globe often take advantage of Brand Portals to organize subsets of assets for all of their regional teams.
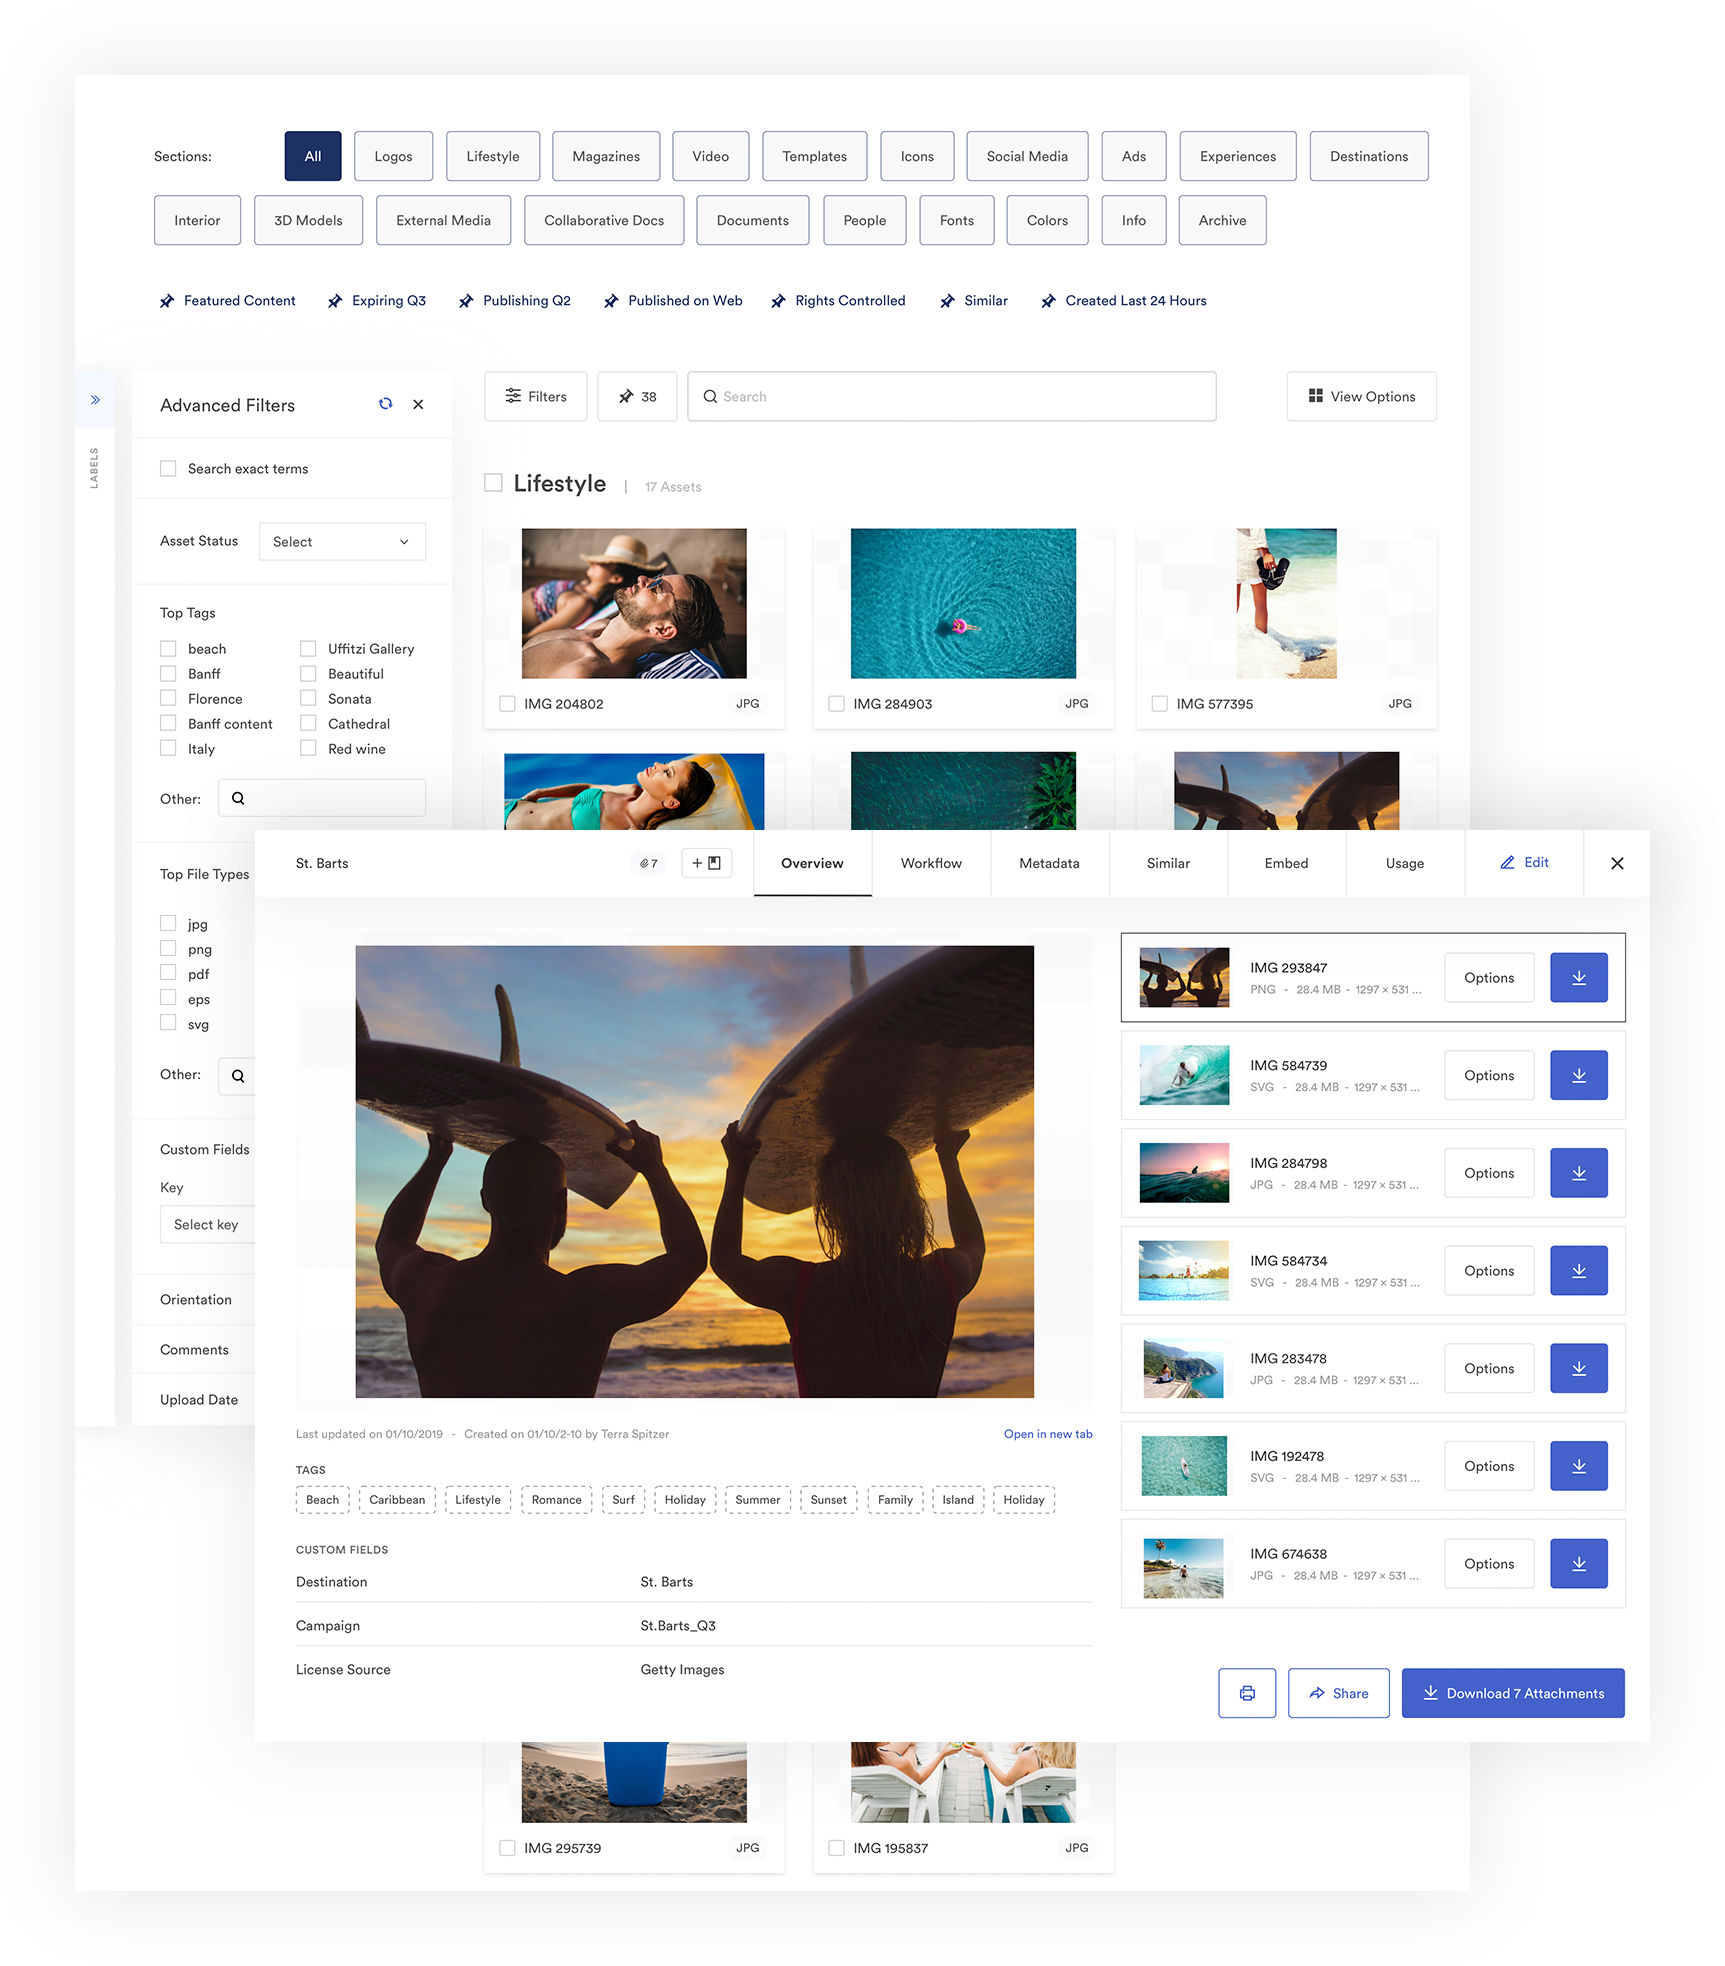
You can share digital assets with other Brandfolder users by adding them to the Brandfolder, Collection or Portal you want to give them permission to access. You can also share individual assets or groups of selected assets in cases where you only want to share a few specific assets.
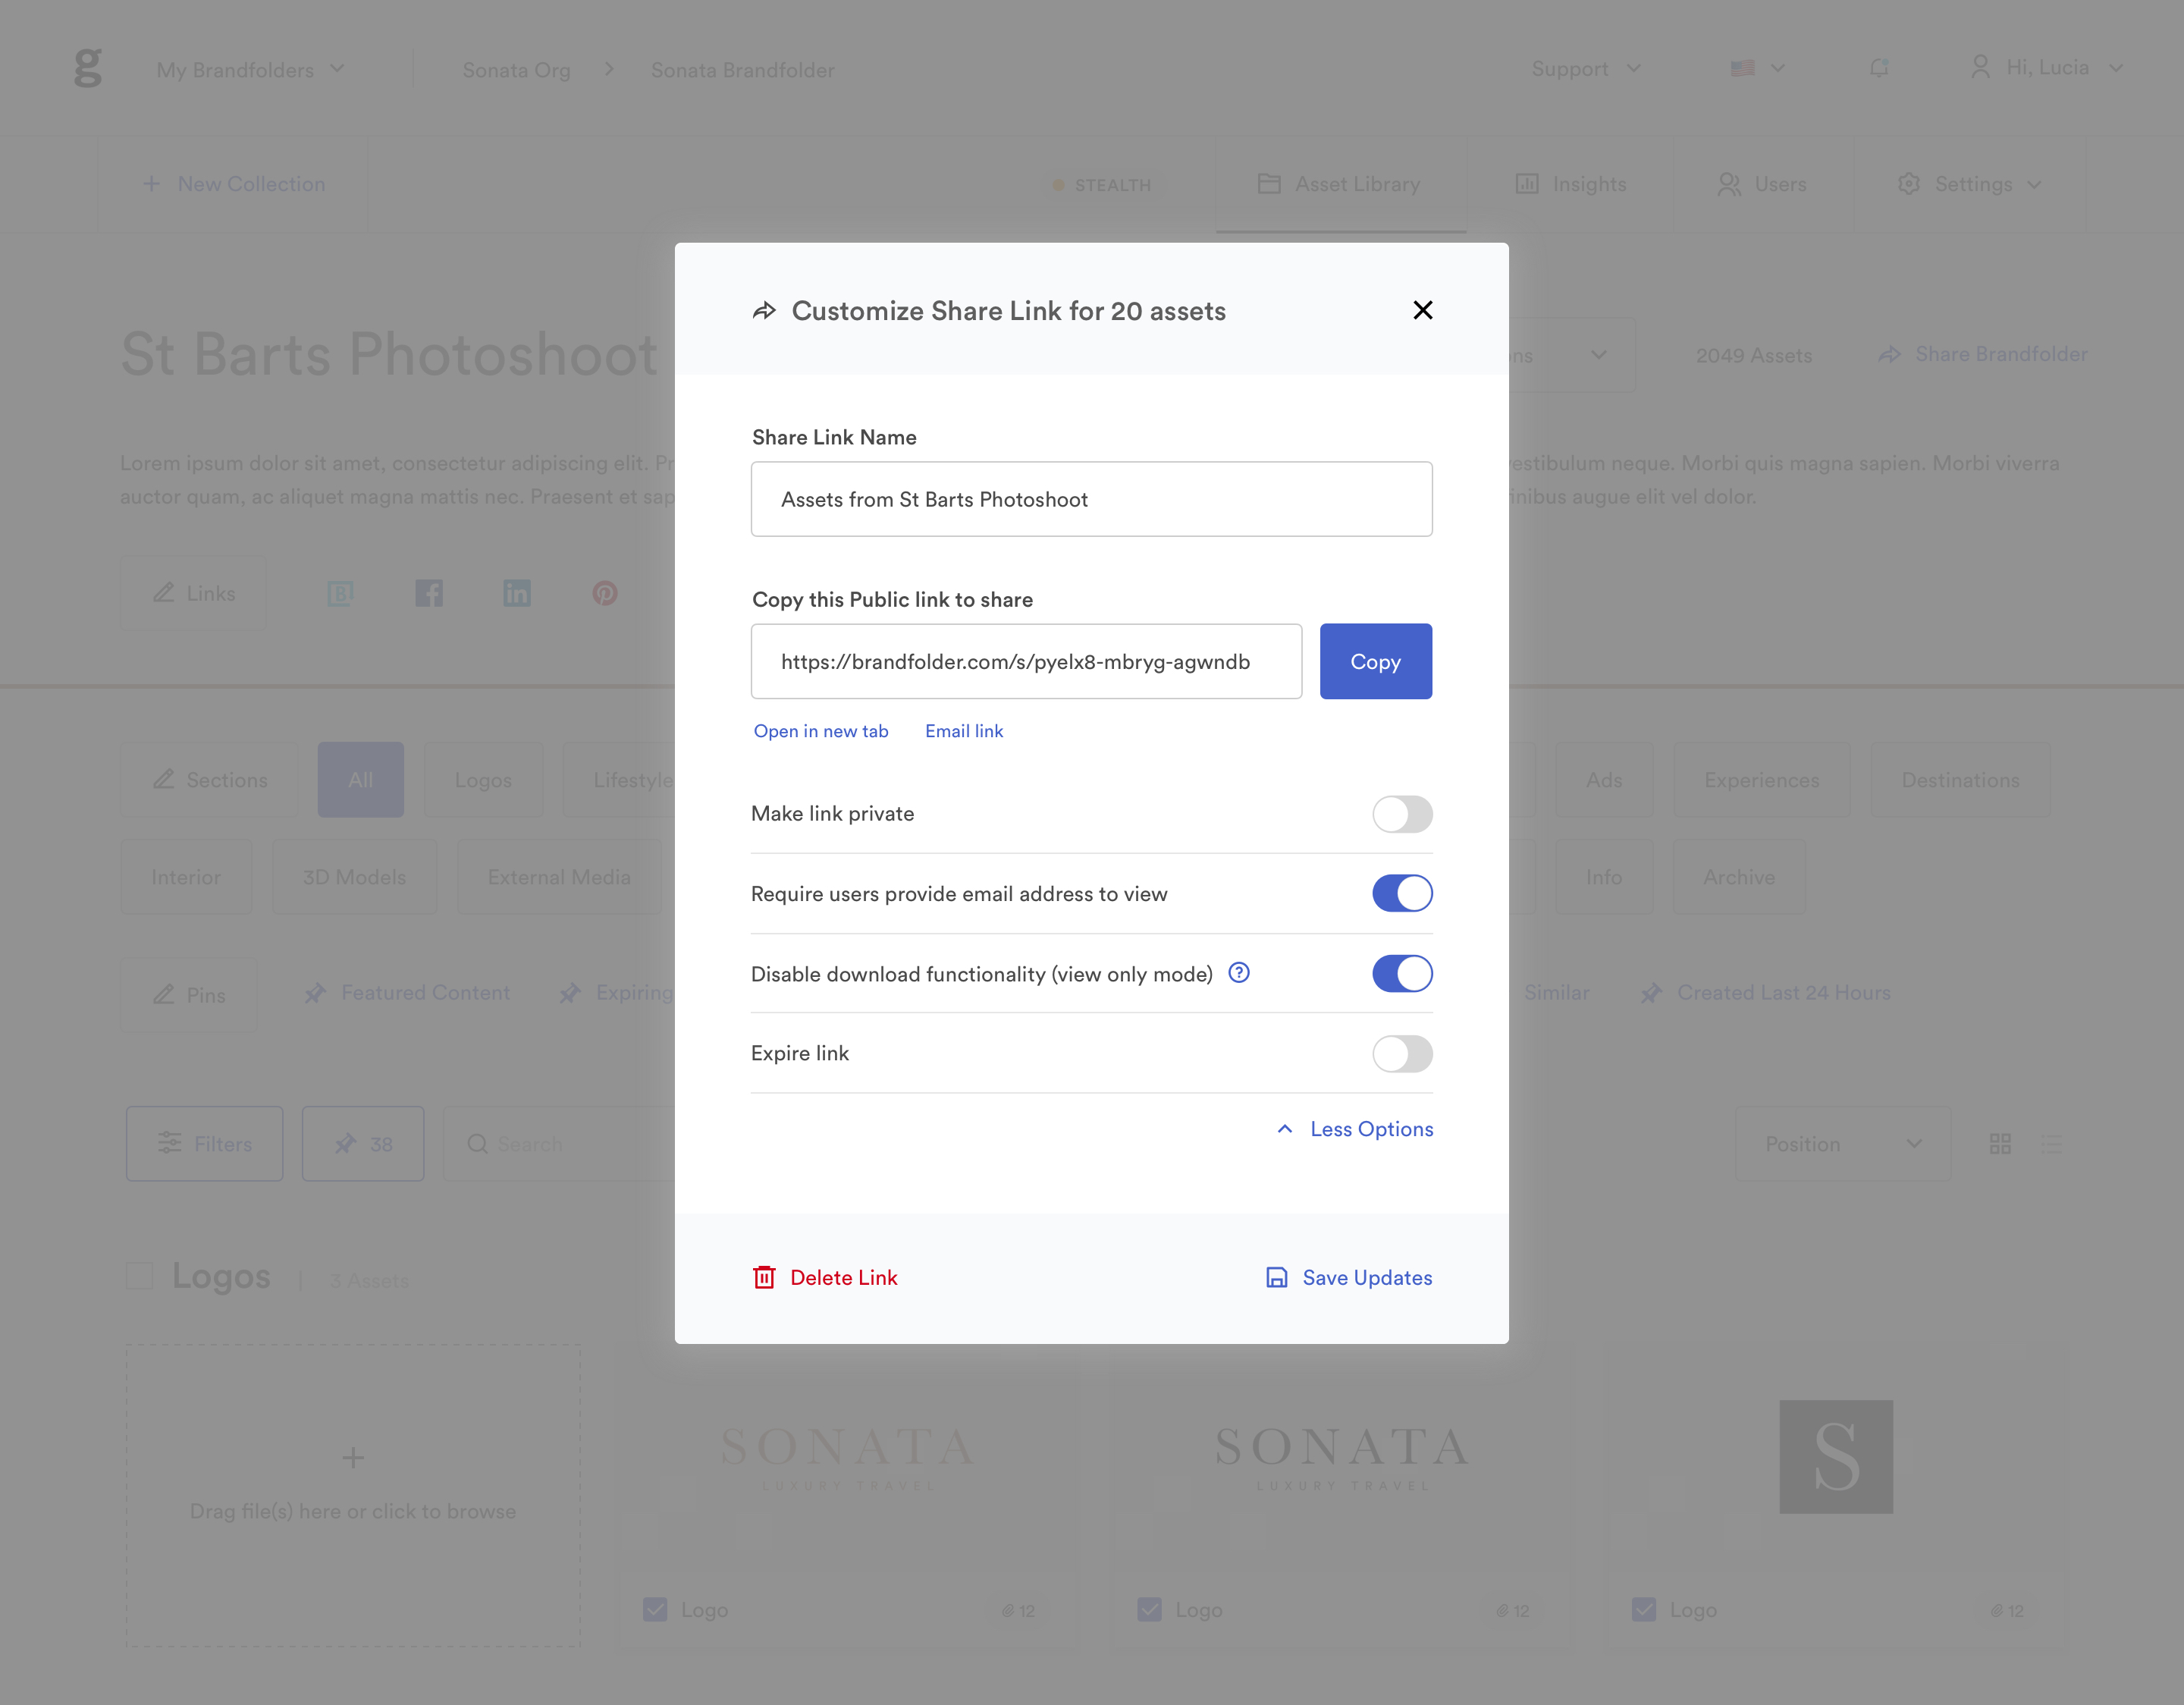
If you want to share assets with other stakeholders that aren’t Brandfolder users, you can send them a custom share link. Our sharing features allow you to restrict download options for share links and set share links to expire, so you can control who can actually use your assets and for how long.
Our platform also helps you keep your asset library up-to-date in a number of ways:
- Detecting and merging duplicate assets
- Allowing users to set assets to expire after a certain date
- Giving users the option to require that all asset updates and new uploads be reviewed and OK’d before they become available for use.
We provide a full version history for every asset, too, so teams always have the information they need to determine which asset version is the most recent.
3. Establish A Review & Approval Process
While we’re on the topic of asset reviews and approvals, let’s talk about establishing that process. Most teams with a digital asset management system in place to store their brand assets only require review and approval when a new asset is uploaded or when an asset is updated. After that initial review, they typically don’t require extra reviews/approvals for deliverables — teams can download an asset from their DAM and immediately begin using it.
However, you can certainly require your teams to check-in at different stages in their workflow. This approvals process will look different for every team and type of project, so it’s best to hash out your team’s processes early on and make sure everybody is aware of the flow. As we mentioned earlier, we recommend including all approvals information within your brand guidelines so everybody can find it.
How This Works in Brandfolder: Get Notifications for Asset Reviews & Lock “Pending” Assets
After onboarding is complete and all of your existing assets are uploaded to Brandfolder, you can set up Brandfolder to trigger a notification everytime a new asset is added and ready for review. You can allow certain users to add their own assets and choose who on your teams has the ability to review and approve them (typically, team managers and creatives field new asset approvals).
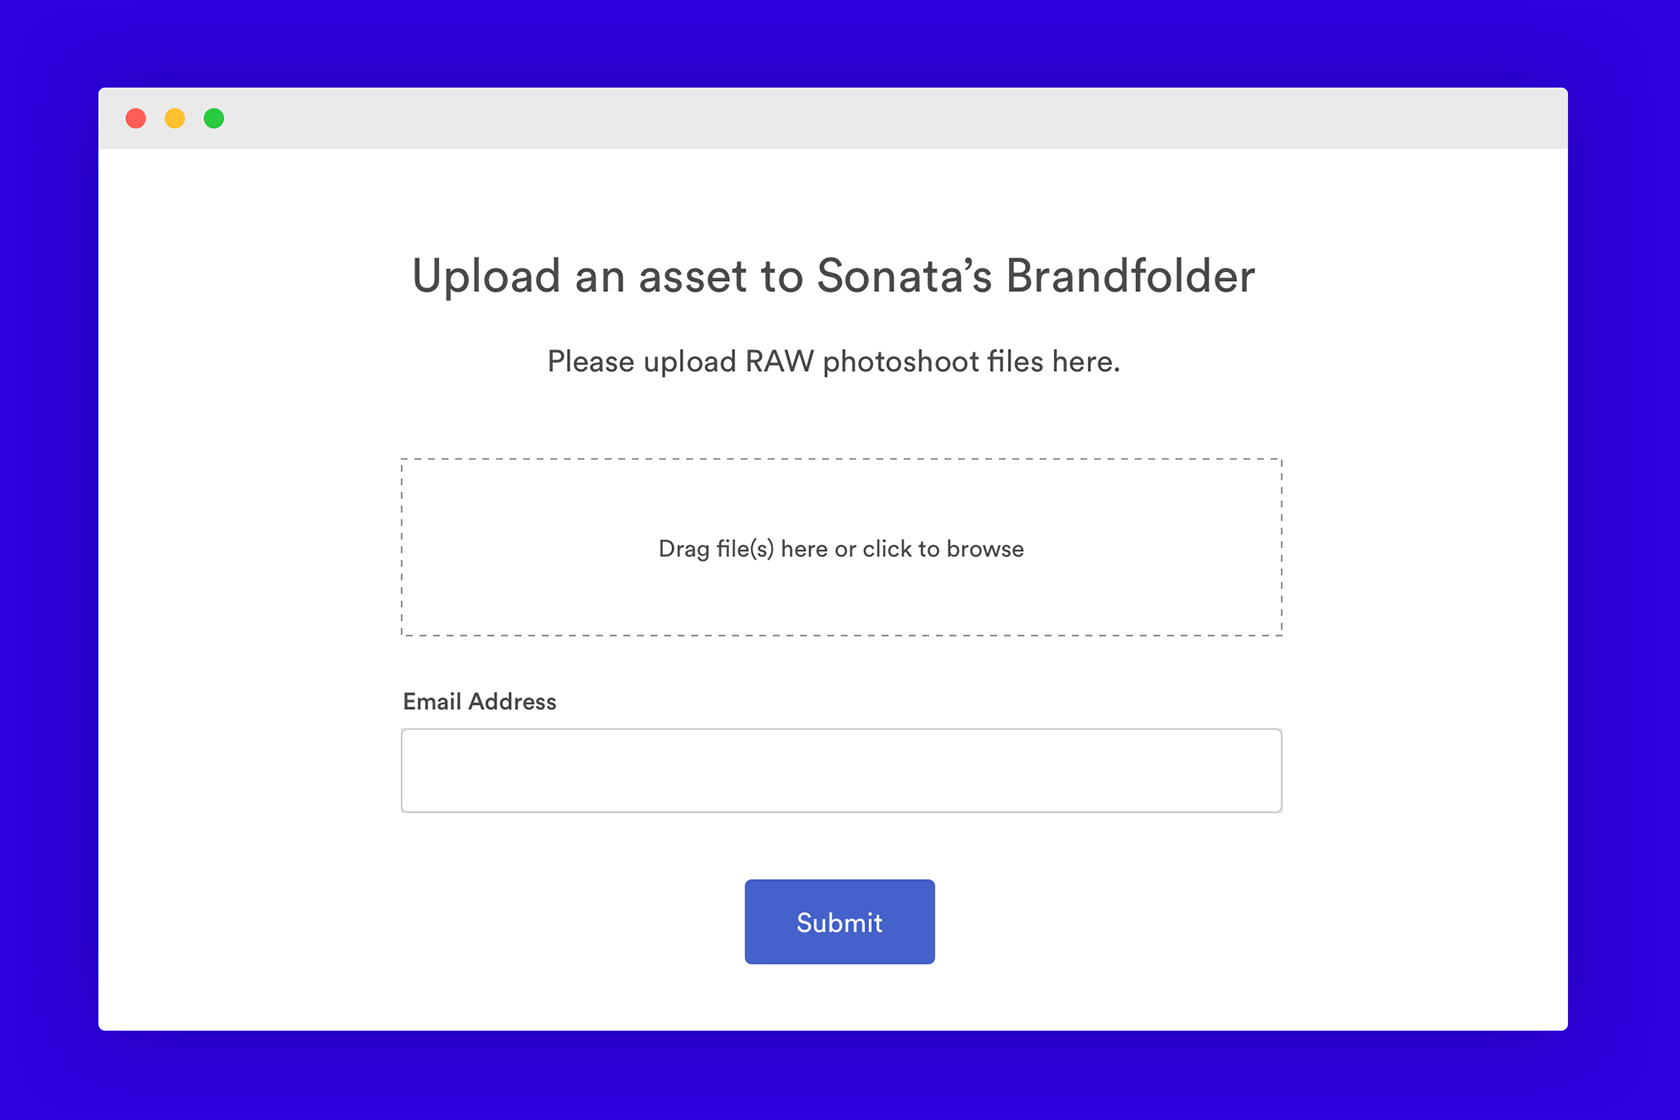
You can even receive assets from non-Brandfolder users — for example, if you work with an outside creative agency — by sending them a Guest Upload link. Before sending this link off, you can choose exactly where you want the asset to be uploaded. Once it is, you’ll receive a notification to come review and approve the asset.
When uploaded into Brandfolder, new and updated assets will appear as “Pending” so they’re unable to be downloaded and used; assets only become available for use after they’re approved. That way nobody accidentally downloads and uses an incorrect asset version.
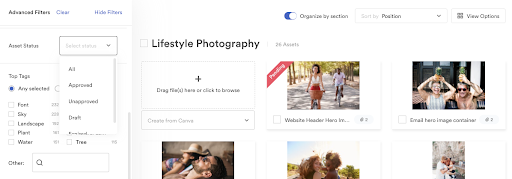
When it’s time for an asset update, whoever is updating the asset can easily check it out for edits. When the asset is checked out, it appears as “Pending” so nobody can download and use it. Then, once the edits are complete, the editor can check the asset back in so it appears as “Ready for Review.” Once it’s reviewed and approved, it becomes available for download again.
(You also have the option of not requiring a review/approval for asset updates — if your creative team manages all asset changes and there’s no need for another review, then admins can save themselves a step. You have full control over the review and approval settings within your Brandfolder account.)
In cases where assets are not approved, admins are able to leave comments directly on the asset explaining why it isn’t approved and the changes that need to be made for the asset to receive the green light. The creator can view those comments, make the necessary tweaks, and then re-upload the new version for another review.
4. Keep Track of Asset Updates
One of the hardest parts of maintaining a consistent brand identity is keeping track of where your branded content lives and ensuring it’s always up-to-date — which is especially true when you go through a rebrand.
Most teams use spreadsheets to keep track of asset usage, but the manual process of keeping track of assets and updating them one-by-one is cumbersome and error-prone. It’s not uncommon for assets to be missed and updates to be accidentally overlooked; this hurts your brand consistency and overall brand image. Plus, this manual process becomes virtually impossible as your brand presence grows.
But teams can streamline this brand management task by using CDN links to power all of their online content and automatically update assets. You can download CDN systems, like Cloudfront for example, to integrate with your storage solution and pull website content directly from your asset library. When you use CDN links to host images and other media across the web, you can feel more confident in your brand image knowing that any updates that are made at the asset level will automatically reflect in every place the asset lives.
How This Works in Brandfolder: Power All of Your Online Content in Brandfolder
Brandfolder is built with a Smart CDN so all assets are automatically assigned a unique CDN link. You can access this CDN link when viewing the asset, and then copy and paste it across websites, email, and content marketing campaigns. Our platform tracks every URL where the link lives, so you can view data around how often it’s viewed and engaged with outside of your DAM.
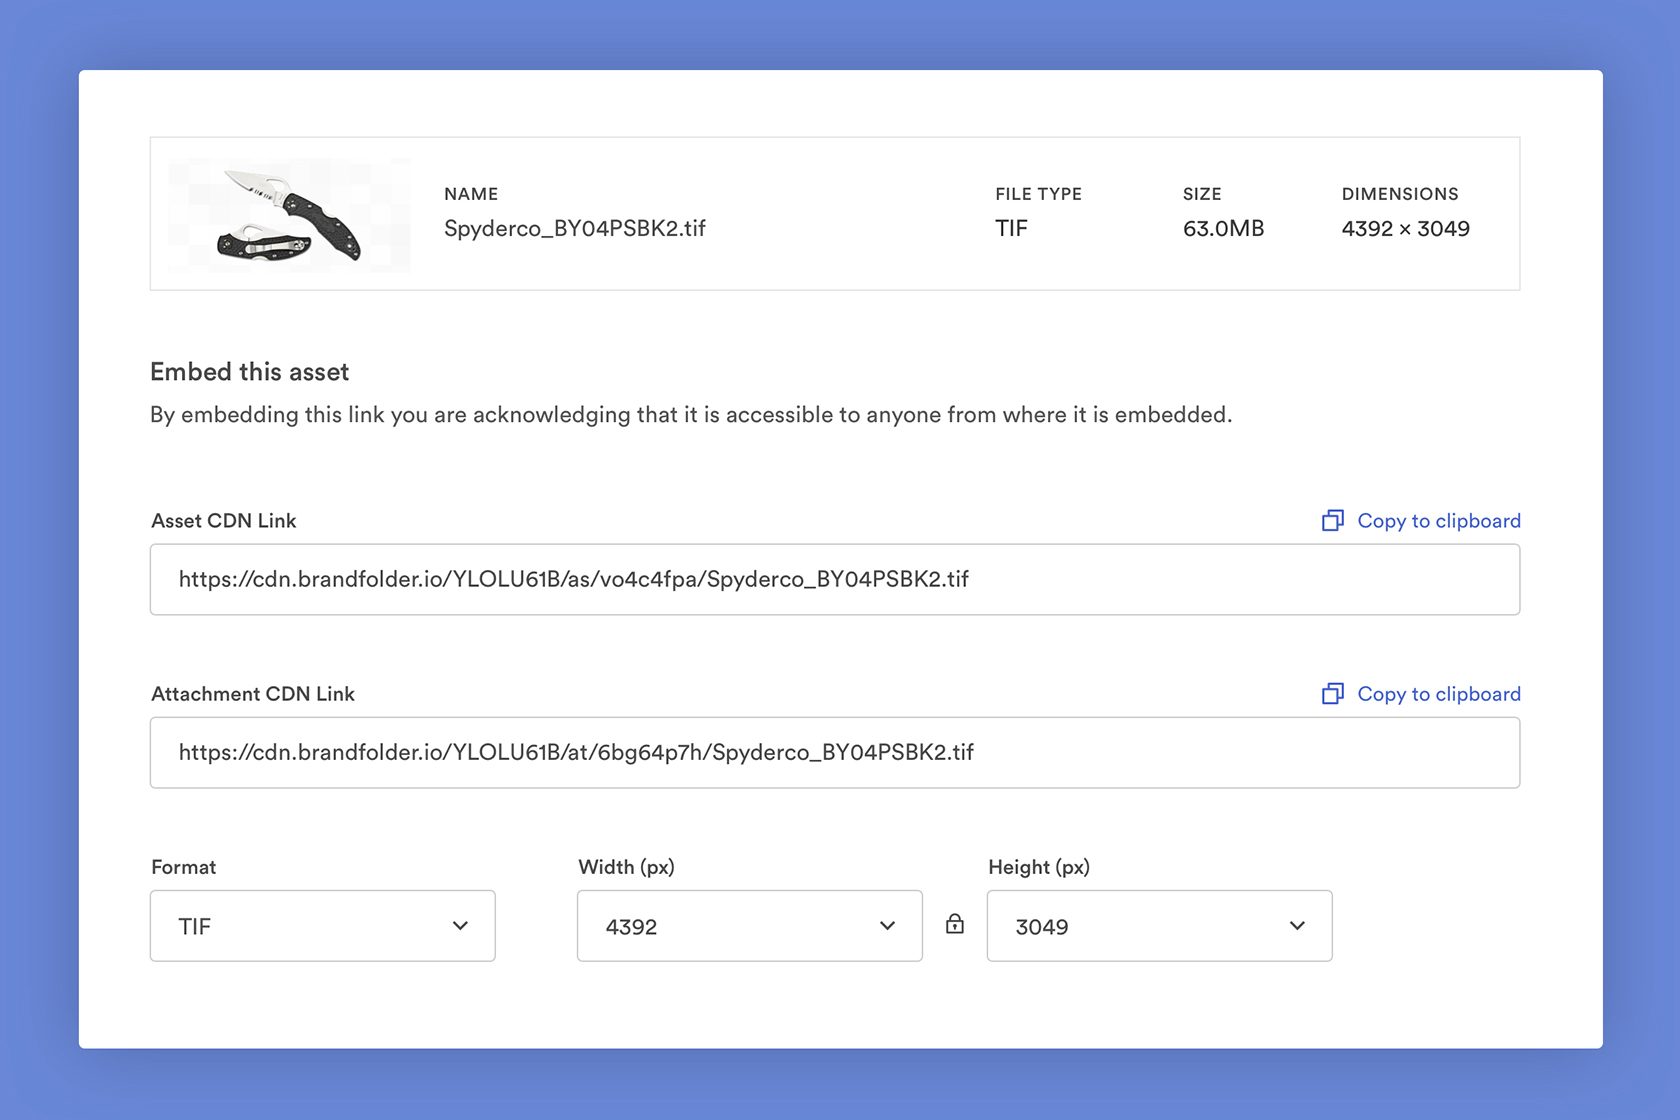
Any time an asset is updated at the Brandfolder level, it’ll update across the web. (If you’re skeptical, you can double-check that everything looks how it should by reviewing the websites where your link lives.)
In addition, Brandfolder integrates with dozens of other applications so you can pull assets from Brandfolder into all of your tools.
5. Create Pre-Approved Templates for Content Creation
Because there’s an almost-constant need for more content, you’re not just managing the content you already have: you also need to manage content production (beyond just approving new assets).
Many companies have a creative team to generate new branded materials, but it’s not uncommon for creatives to become bogged down when they’re also fielding asset requests from all of their other co-workers. Instead of relying on your creative team to support content creation for your entire organization, you can enable teams to create their own branded content by setting them up with customizable templates (then the finished product can be sent to an admin or creative for final approval).
How This Works in Brandfolder: Upload Your InDesign Templates & Have Total Control Over Their Customization
Brandfolder integrates with InDesign so creatives can build InDesign templates and push them directly to Brandfolder to be stored and shared. With both InDesign’s templating tools and our templating features, creatives can control exactly how these templates can be modified so that anybody can come in and customize them without going off-brand. Creatives can lock fonts, colors, and specific elements of the template, choose the exact images that can be inserted in the design and even control how text is added.
Having this degree of control over how templates are customized allows teams to skip the review process for templates. However, you can still require that all customized templates are reviewed and approved before they’re used.
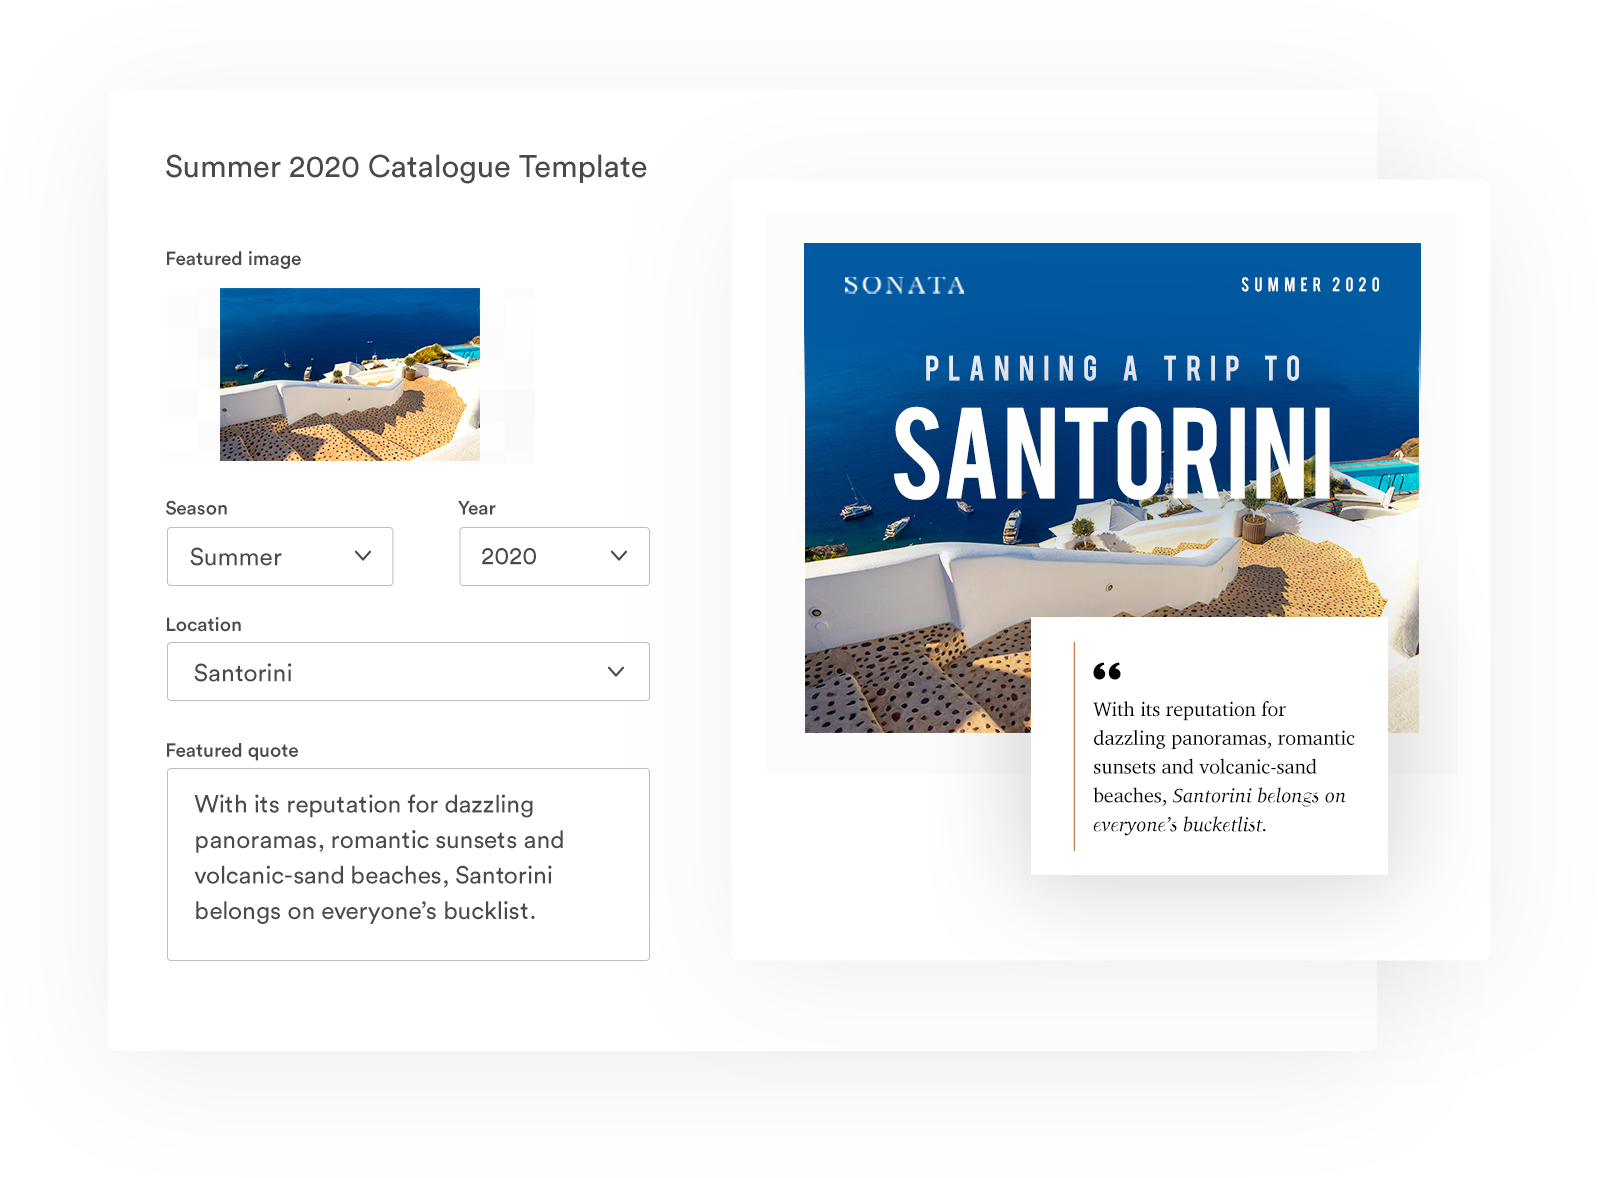
After templates are customized and approved, they can be sent directly to a printer or downloaded from Brandfolder.
To learn more about how brand consistency impacts your teams’ workflow and production, check out our eBook about keeping all of your campaigns on-brand and on schedule.
6. Monitor Asset Usage & Check In With Your Teams
Finally, it helps to monitor asset analytics and check in with your teams every now and then to see how they’re using your brand assets.
Getting this feedback from your teams is helpful for a few reasons: 1) it allows you to check if your teams are following your brand guidelines, 2) it gives you more information about which assets are used most often (and which aren’t being used at all), and 3) it lets you gauge which assets are most successful amongst your target audience and refine your brand strategy.
If you don’t have a way of checking asset usage metrics or monitoring how assets are used in different projects, then you have to rely on anecdotal information. We suggest doing a more thorough quality control check in addition to talking with your teams to get a better picture of how your brand is represented across the board.
Many brands designate a specific “brand manager” or “brand guardian” to do these check-ins and make sure everybody is putting their best foot forward.
How This Works in Brandfolder: Review & Monitor Asset Analytics
Brandfolder provides detailed usage metrics for every asset so you can gather various insights:
- How many times an asset is viewed
- How many times an asset is downloaded (as well as who’s downloading your assets)
- How many times an asset has been shared (by who and with who)
- How many times the asset has been shared online
- Where the asset lives online... and more
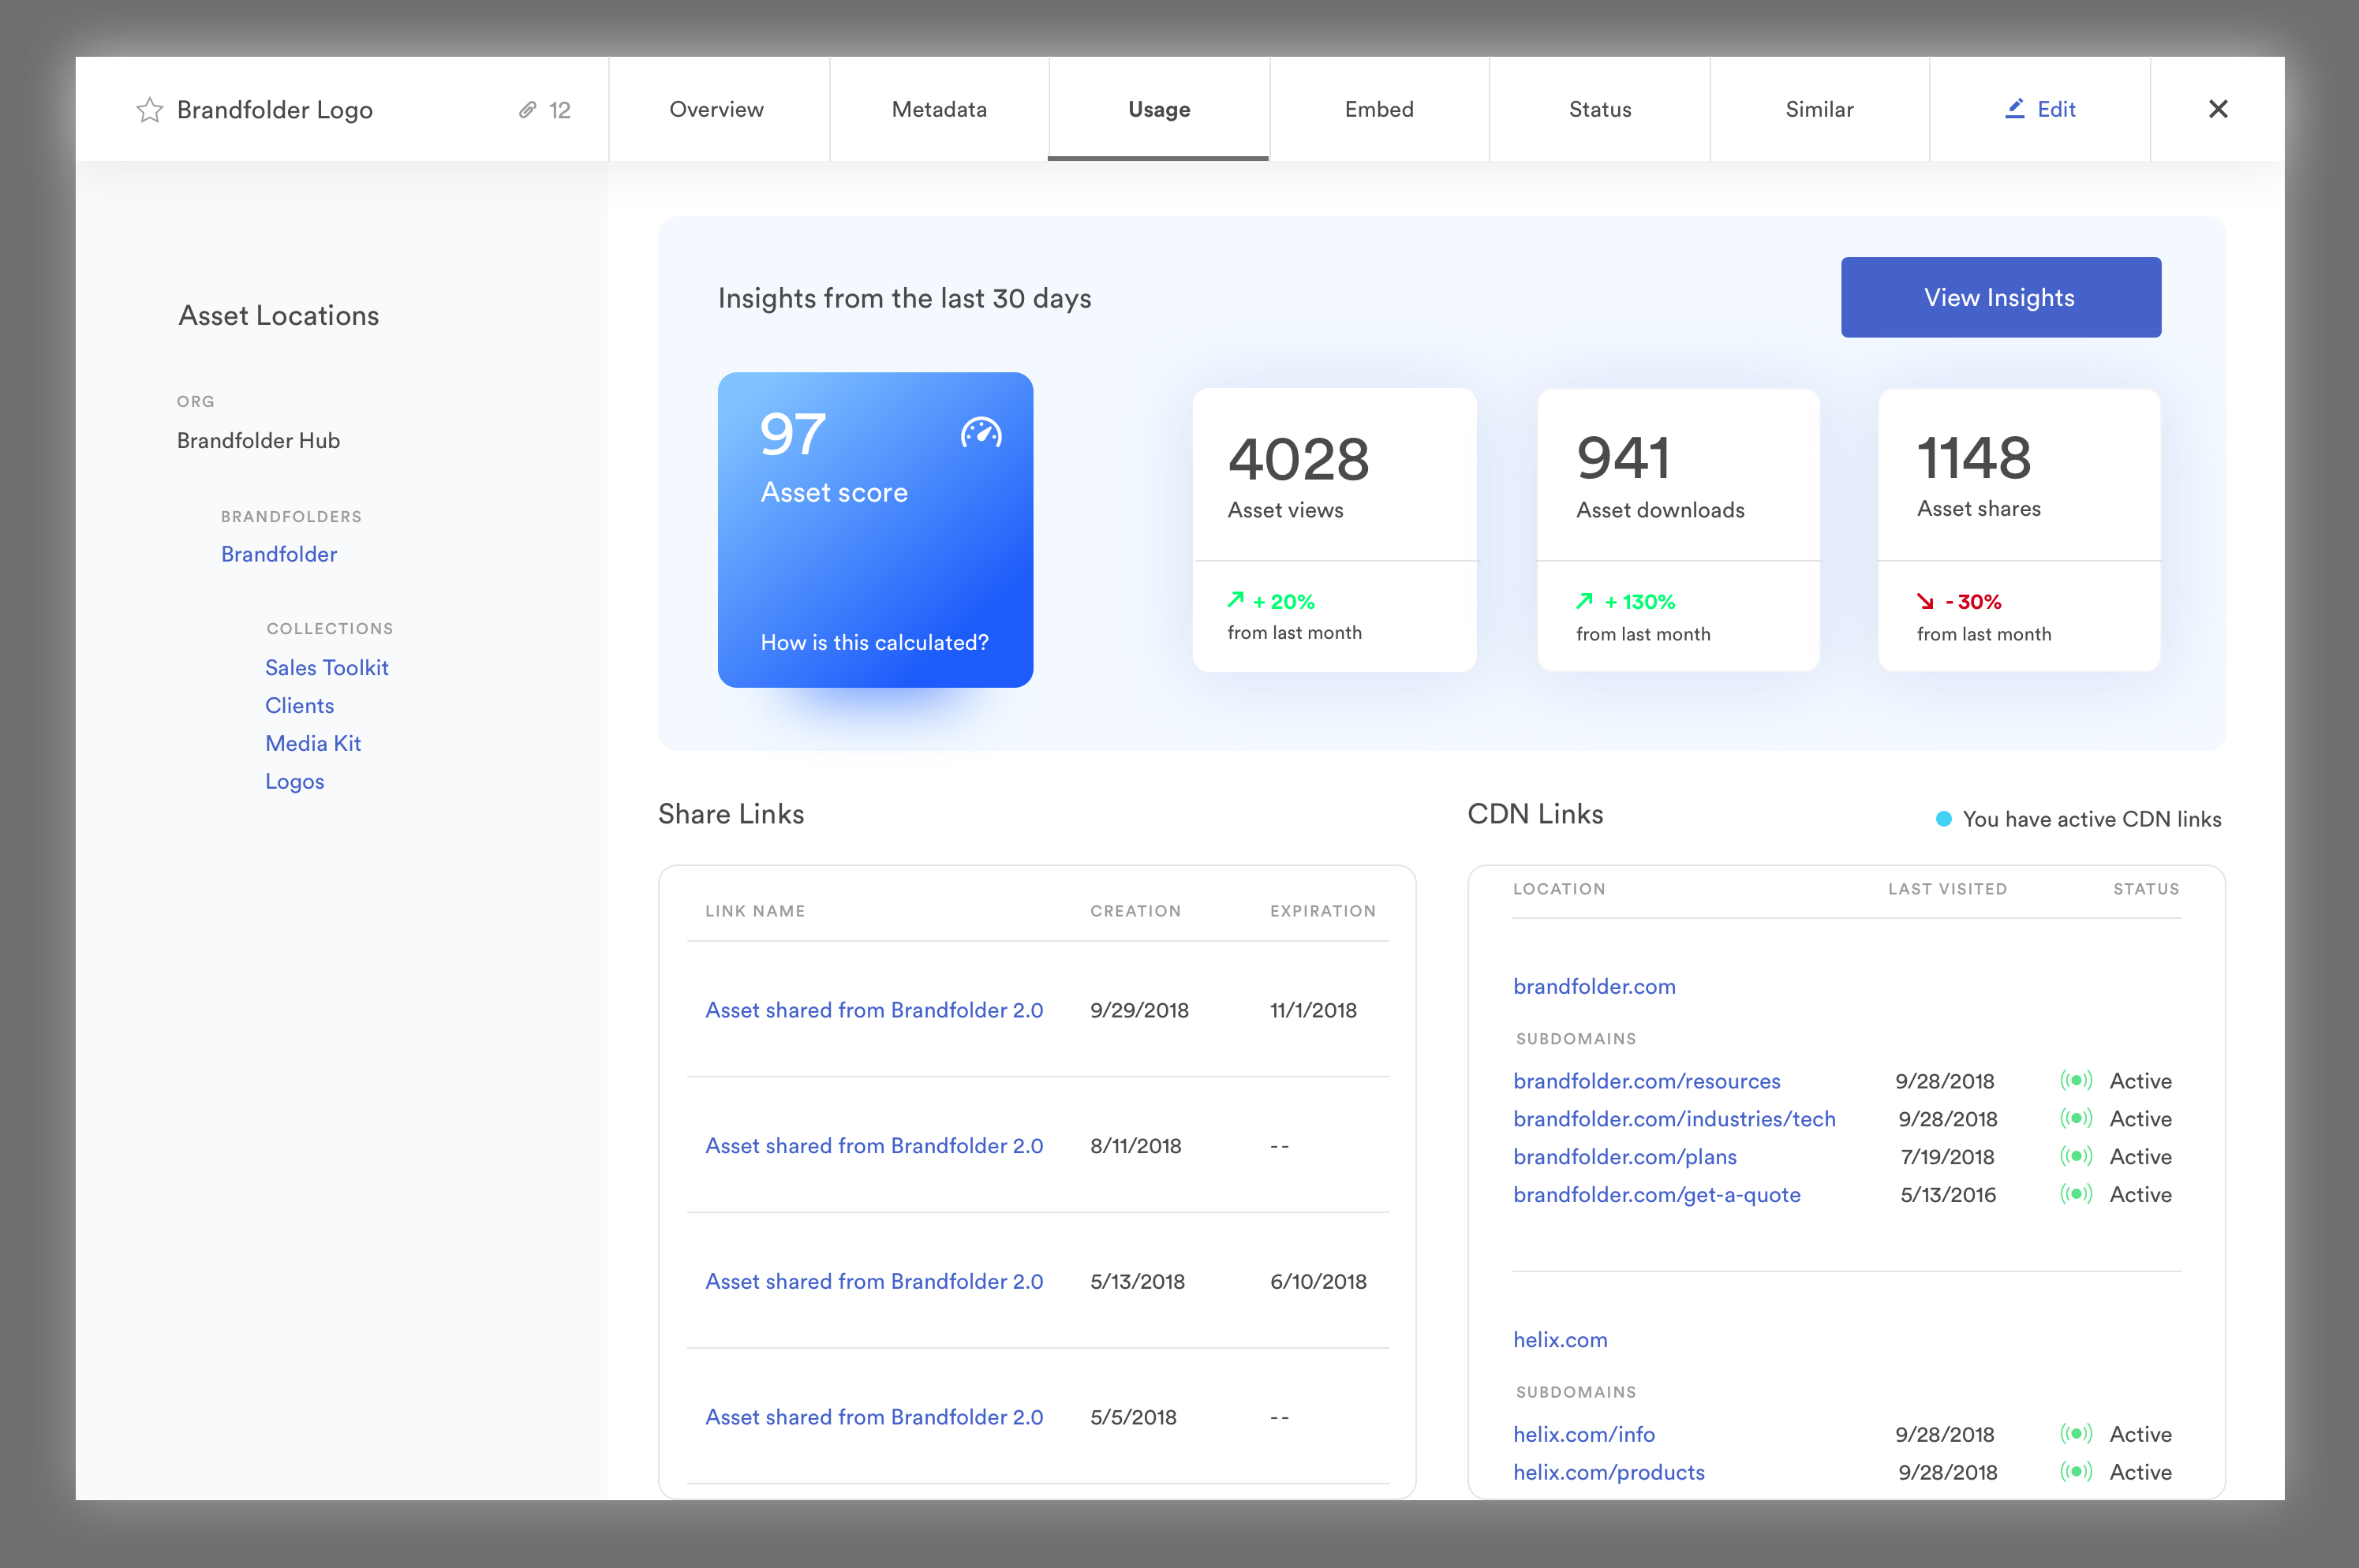
These details allow you to keep tabs on how your teams are using assets and how to ensure brand consistency.
Maintain Your Brand Consistency & Streamline Team Collaboration With Digital Asset Management Software
Digital asset management software makes it effortless to maintain brand consistency by putting all of the right branded materials in the right hands at the right times and allowing teams to collaborate on asset usage and keep each other in check. But DAMs are also beneficial for a variety of other reasons: they save teams time, they make asset organization and accessibility easy, they provide simple sharing methods and they accelerate workflows.
To learn more about Brandfolder’s brand management features and how transitioning to our software can help all of your teams stay on-brand, get in touch with us for a free demo.

