Get branding tips and expert advice delivered straight to your inbox.

Microsoft’s centralized digital storage software, SharePoint, helps teams collaborate on documents, custom lists and other digital projects through its file version history and version control features. To put it simply, versioning is the method of numbering, organizing and displaying recent changes in a document so teams can see how and when others have modified digital files. SharePoint version history also allows you to find and restore a previous version of any file.
That said, SharePoint’s version management capabilities are somewhat limited. It doesn’t integrate with apps like Adobe’s Creative Cloud and, for the most part, only works with Microsoft’s suite of tools. Plus, with versioning in SharePoint:
- You have to really pay attention to file names or you may end up with duplicates.
- Sharing files with external users requires certain permissions that burden the admin team.
- Files are organized in a folder structure, which can be difficult to navigate.
However, there is a way to get past these issues: Use software that offers smooth workflow features, unlimited guest sharing and smart searching functionalities. For example, Brandfolder’s file version history shows you every previous version of content plus who made the changes. To learn about how it works, skip ahead to that section. Otherwise, in this post we’ll walk through…
- How version history in SharePoint works
- The pros and cons of using Microsoft SharePoint
- How Brandfolder improves version control
- What Brandfolder can do for you *In addition to version control, Brandfolder gives teams the ability to organize all digital asset types including documents, images, videos and more. In this clear, easy-to-search system, users can intuitively share digital assets with internal and external parties. Book a demo with Brandfolder to see exactly how our software streamlines collaborative work and digital asset storage. *
How Version History in SharePoint Works
Version history in SharePoint is available for all files in the Document Library. This includes Word documents, Excel spreadsheets, PowerPoint decks, OneNotes and custom lists. It only takes a few minutes to enable version control for lists and libraries although it is typically enabled by default for libraries.
Enabling Version Control and Adjusting Versioning Settings
To enable versioning:
- Open the list or library in which you want to enable version control.
- Click the General Settings menu (the wheel and spoke icon) and scroll to either List settings or Library settings.
- Select Versioning settings. Once you’re on the Versioning settings page, you’ll have the ability to adjust a variety of version control settings for documents and lists. For SharePoint documents, you can create minor and/or major versions.

SharePoint documents also allow you to:
- Create a new version for every document edit, using major versions alone or both major and minor versions together.
- Limit the number of versions saved in the version history.
- Set restrictions on who can view drafts.
- Require documents to be reviewed before other users can edit them.
- Require content approval for newly submitted items.
For SharePoint lists, you can:
- Create a new version for every list edit (lists only support major versions).
- Limit the number of versions saved in the version history.
- Set restrictions on who can view draft items in your list.
- Require content approval for new list items.
Once you’ve modified your settings to fit your specific needs, you’re all set! You can also go back into these settings at any time to make changes or disable versioning altogether.
Access File Version History in Your Document Libraries and Custom Lists
On each document library’s home page, you can view a list of all Word documents, Excel spreadsheets, PowerPoint decks and OneNotes that you’ve added to that specific library. You can also see each file’s metadata, including the name, type of file, when it was last modified and who modified it.
SharePoint also gives users the ability to add other metadata columns to sort and organize files. To add a column, click the Add Column button and choose what type of metadata you’d like to appear on the home page.
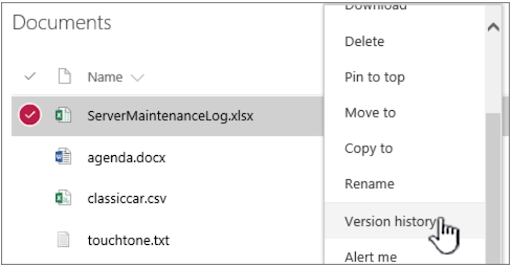
To access file version history, right-click on the file you’re interested in viewing and select Version history from the drop-down menu that appears.
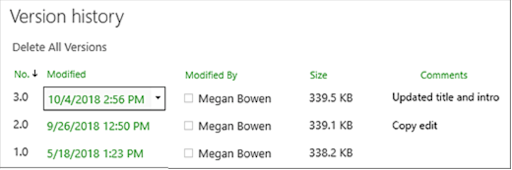
A pop-up window will appear on your screen listing major revisions. You’ll also see minor revisions if they’re enabled and you’re working in a document library.
Major revisions will appear as whole numbers (Version 1.0, Version 2.0, Version 3.0), while minor revisions will appear as decimals (Version 1.1, Version 1.2, Version 1.3).
So what’s the difference between major and minor revisions? Minor revisions allow for small changes and are usually only utilized for specific content approval scenarios. For the most part, users are working with and comparing major revisions within their Version history window.
In this pop-up window, users can see the date and time each revision occurred. They can also view the file’s size and additional comments from other users. While you cannot view exactly what changes occurred within each previous version on this screen, the window does display changes to metadata.
To view prior versions of files, click on the version you want to view. SharePoint will then open the file in the native Microsoft application so you can view, save, download or modify past versions. This makes it easy to restore prior versions and/or compare earlier versions to more recent versions of the file.
Every time a change is made to a file in SharePoint or a new version of a file with the same name is uploaded, another version is generated in SharePoint. It will be available for view or download from there.
Restoring Old File Versions in SharePoint
You can restore and delete an earlier version from the main Version history pop-up window. When you hover over each version, a clickable downward-facing arrow appears that opens another drop-down menu.
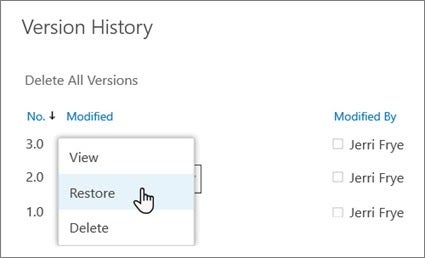
This menu gives you three options: View, Restore, and Delete. To restore, simply click the Restore option. This creates another major revision. It also marks that version of the file as the most current version. But don’t worry — the Version history window keeps all prior versions intact and listed below.
Comparing Versions in SharePoint
To compare one version of a file to another, start by selecting one of the versions in the Version history window. Once selected, it will open in the native Microsoft application. Then, select the Review tab from the top menu bar. This will change the lower menu, giving you a clickable Compare option.
You can choose to compare the file to the last major revision in SharePoint, the last version of the document saved on the server or to a specific version in SharePoint. The Compare menu also gives you the ability to compare versions in a single document. In this view, each version is separated by a horizontal black line. Or, if you’d like to combine versions into one document instead of comparing them, the Compare menu makes it possible to do so without any horizontal lines separating the versions.
When comparing two versions of your file, the Microsoft application you’re working in will pull both versions and display them on opposite sides of your screen. It will also label each version so you know which is which at a glance.
How Does Version Control for Document Libraries Differ from Version Control for Custom Lists?
Version control between documents and lists doesn’t differ too much apart from the fact that lists are created in SharePoint and not another Microsoft tool. That means all changes to a particular list will be available to view right within the Version history window. You will not need to open each version to see how it has been changed.

Pros and Cons of SharePoint for Document Management
Pros of SharePoint
Teams of all sizes, from individual departments within small businesses to large sectors of enterprise companies, can use SharePoint version history tools. The Version history window is pretty straightforward and makes it easy to access file version history. It also simplifies the process of restoring and comparing specific versions of a single file.
Want to allow users to view these versions without changing them? Administrators can restrict editing access so that users are able to find and download documents but not modify them.
As far as storage goes, you can save and organize all of your team’s Microsoft documents in SharePoint.
Cons of SharePoint
The software is somewhat out of date compared to other solutions on the market. For example, SharePoint doesn’t integrate with a lot of other tools and applications. If your team uses Google Drive, you’ll have to convert all Google Docs, Sheets and Slides to Microsoft’s equivalent before you can work on them in SharePoint.
It’s important to note that the version history of those Google files will not transfer over to SharePoint, either. Also, there is no way to upload and view the version history of Photoshop images, InDesign brochures or external videos.
SharePoint’s organizational capabilities are, to some extent, dependent on its users. For example, if users edit or re-upload files that do not have the same exact file name as the existing files already in SharePoint, the files won’t be grouped as “revisions.” Instead, files with updated names appear as totally separate and new files in the document library rather than versions of already-existing files. The result? Duplicate files floating around will make it more difficult to find the exact, most up-to-date file you need when you need it.
The biggest con of SharePoint is that it’s really only for internal teams to collaborate. In fact, it doesn’t allow for external stakeholders to use it at all. So if your business works with clients, freelancers or partners, those individuals may not be able to access the files they need.
Brandfolder: A Better System for Version Control
Unlike SharePoint, Brandfolder is a digital asset management software, which means it does far more than just manage file versions. With Brandfolder, teams can easily store, organize, share, manipulate and analyze assets. Also, Brandfolder allows users to upload hundreds of different content formats (including 8K video, documents, images and 3D renderings) with little to no training required.
With Brandfolder, teams can:
- Collaborate with internal members on updates and view the detailed version history of files in one easy-to-navigate window.
- Annotate any asset type (including video) and work through comments before ever exporting a file for changes.
- View version history to track edits, restore previous versions and ensure files are never permanently deleted.
- Set approvals and processes in place so that every asset is on-brand and signed off on by the correct party.
- Create a share link to distribute assets with trusted guests, partners, and external users.
Let’s walk through Brandfolder’s different workflow and versioning capabilities to highlight how our software differs from Microsoft SharePoint.
Brandfolder’s Workflow Features
Once you’re in Brandfolder, you can search files via:
- Collections and Sections: Collections are groups of related files you can show to or hide from specific users. Sections are located within Brandfolder Collections. They separate content by category, type and purpose so that users can quickly narrow down their search to specific items (e.g. groups of people like a sales team or uses such as social media images).
- Tags: Much like hashtags on social media posts, Tags in Brandfolder are search terms you can manually enter in the Asset Details section of each piece to make it easier to organize and search for later on. You can pin tags so that the most frequently searched for assets are only a click away. Tag individual items or an entire group of items in one go using the Bulk Toolbar.
- Search terms: Even if you don’t know the exact name of the file you need, each asset's name, description metadata and other details are full-text searchable regardless of what type of content it is (yes, even images and videos are searchable). This feature makes it easy to find what you need using only a keyword or phrase. Brandfolder takes search a step further by allowing users to filter their results down to any term within a given phrase, all terms in a phrase, any instance of this phrase or the exact phrase only.
- Brand Intelligence: Our proprietary AI uses machine learning to automatically analyze assets, create relevant tags and add those tags to files for you. And much like Google, Brandfolder’s Brand Intelligence tools use natural language to provide results based on intent. That means users can search anything from key terms or phrases in text to items or colors tagged in a photo. In fact, our Video AI feature even transcribes video files, too! This means that when you’re searching for a video, you can type a quote from it in the search bar and our AI will narrow down the results to pinpoint exactly which one you need, right down the scene. Additionally, Brand Intelligence can be trained to recognize your product images, detect and manage duplicate files and analyze asset usage.
Once you’ve found what you’re looking for, you can click the file to open it. A window will then appear with an overview of the file you’re viewing.
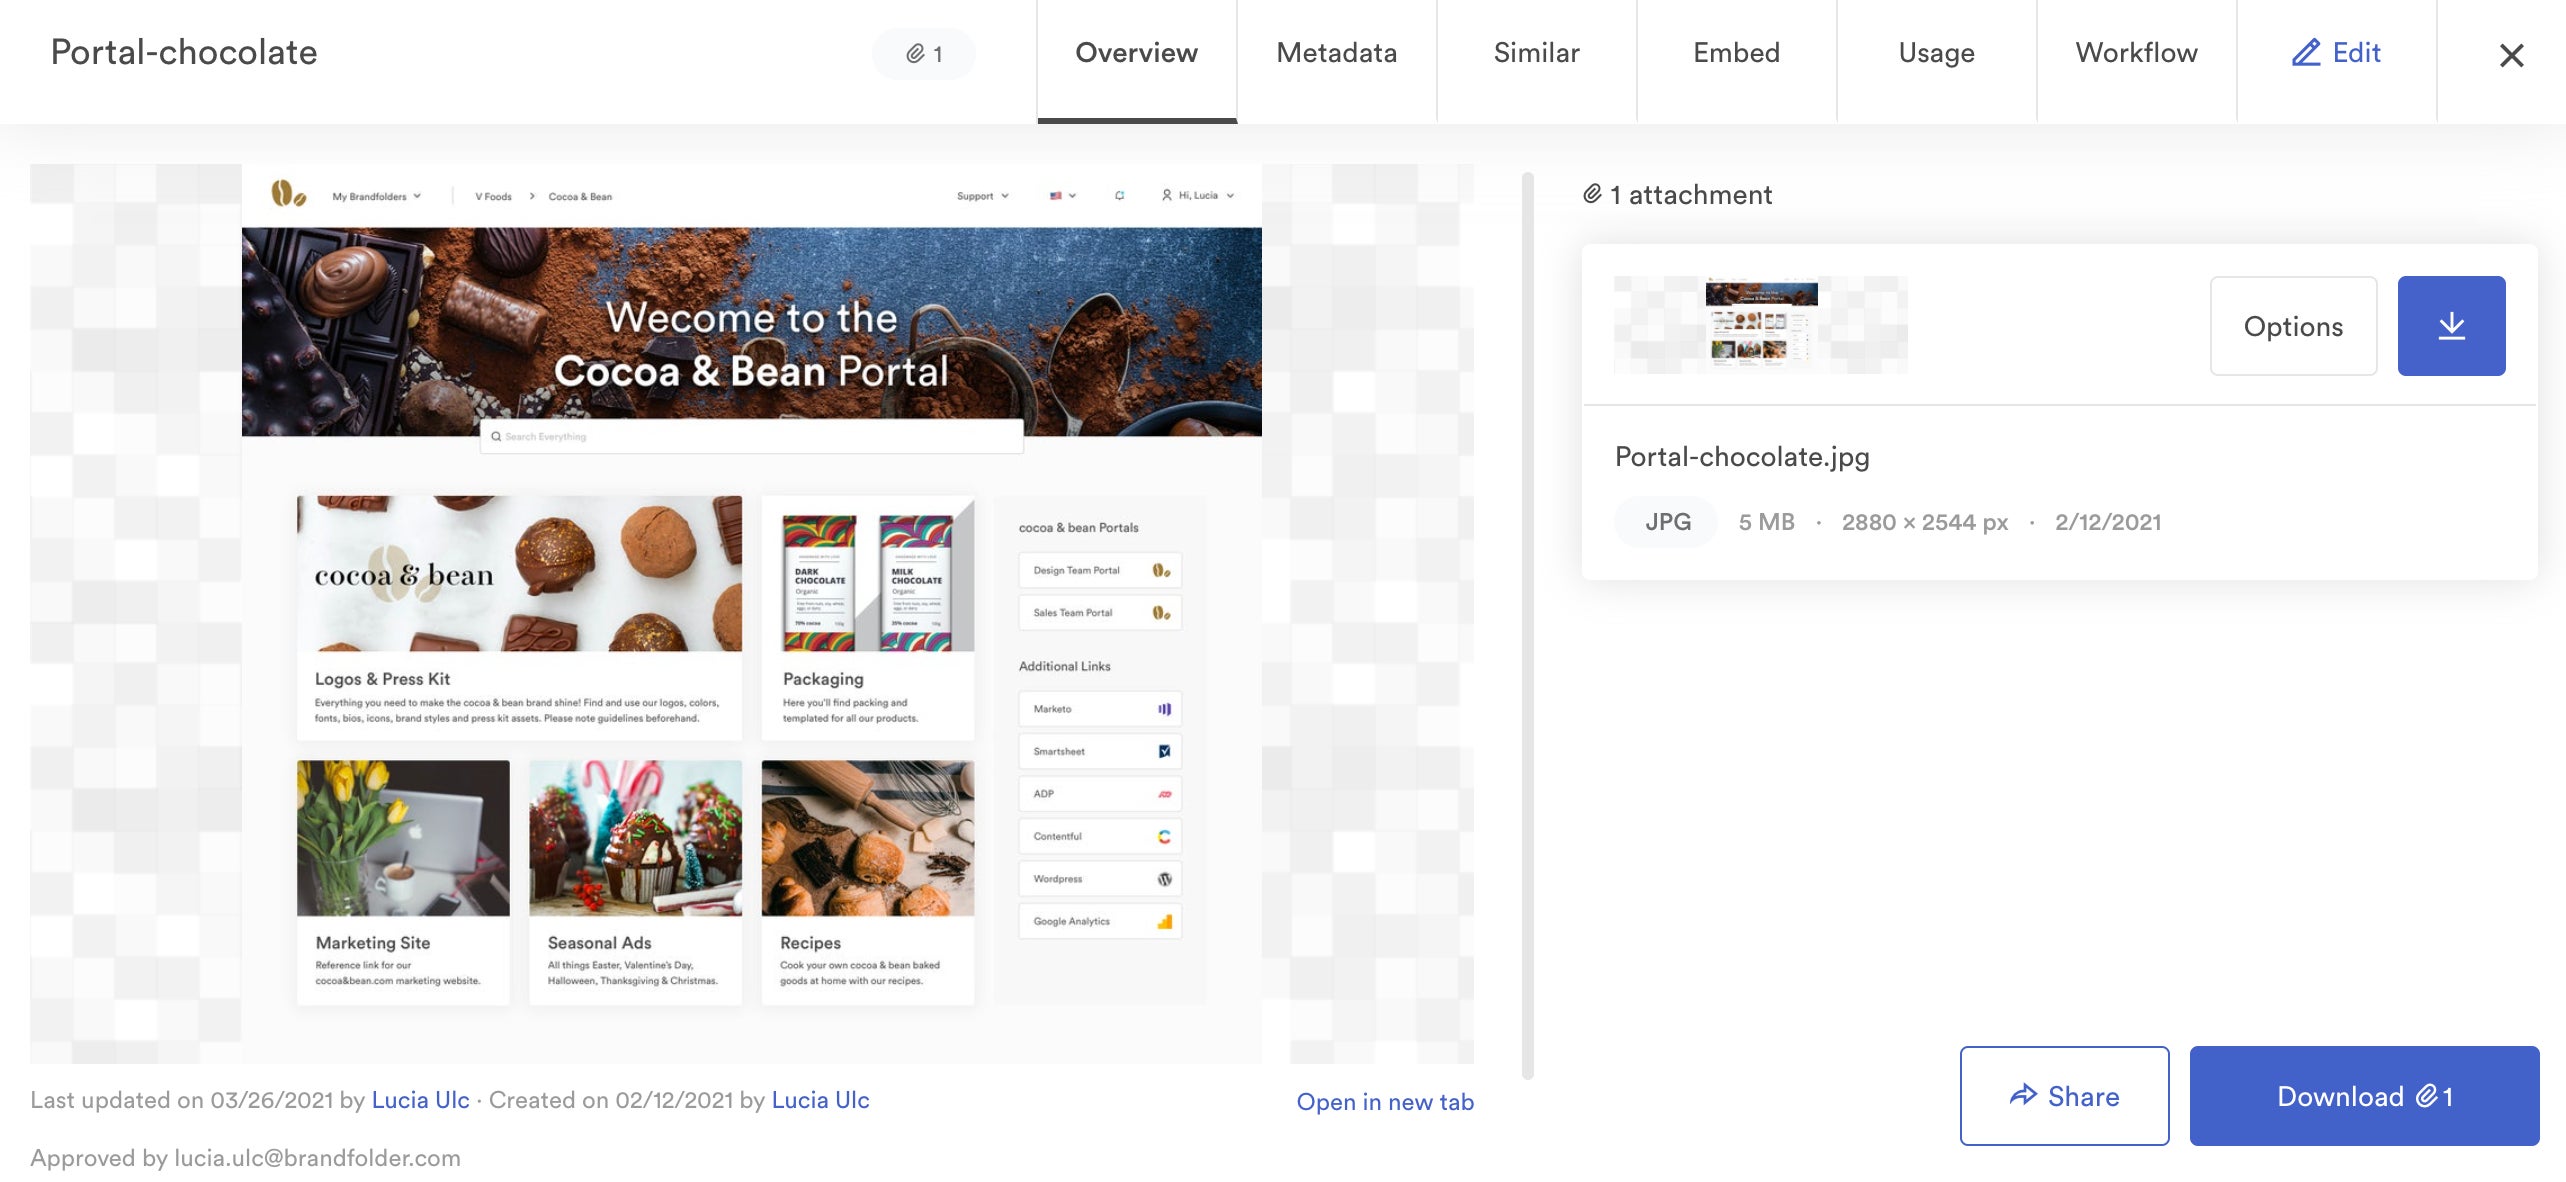
Within this window are tabs with additional asset information:
- The Metadata tab compiles all of the file’s metadata.
- The Similar tab shows all duplicate or similar files.
- The Embed tab generates a Smart CDN (Content Delivery Network) link. This link allows users to easily swap out or remove assets they own from anywhere those assets are published on the internet right from within Brandfolder. The Embed tab also provides analytics so you can see where each asset is published online, who has access to it and how it’s performing.
- The Usage tab allows admins to see analytics around how and where an asset is being used.
- The Workflow tab allows teams to collaborate on an asset within Brandfolder
Within the Workflow tab, you can also use it to add annotations, view the file history and make changes to an existing asset. Adding annotations and comments allows you to collaborate in real-time with team members that have permission to access the file. Viewing the file history gives you detailed information on different versions of the asset as well as the option to upload a new one.
And last but not least, the Brandfolder Workflow tab features the platform’s unique Check In/Out feature which makes it easier to revise assets. Here’s how: Once you’ve worked through all the annotations and comments with your team and determined how an asset should be updated, you can then “check out” the file to make changes.
Like a book being borrowed from the library, checking out an asset will automatically generate a label that explains it’s temporarily unavailable for download. This prevents other users from downloading the asset while you’re working on it. Users can, however, still view the asset and all of its information within Brandfolder while a file is checked out.

To check out an asset, select the Check Out button on the Workflow menu bar. After you’ve made the appropriate changes in a third-party application (e.g., Google Drive, Photoshop, Canva, HubSpot, Vimeo, etc.), you can then check the asset back in.
Want to view the updated asset’s version history as you go? You can do that within the Workflow tab too by selecting the Version History button.
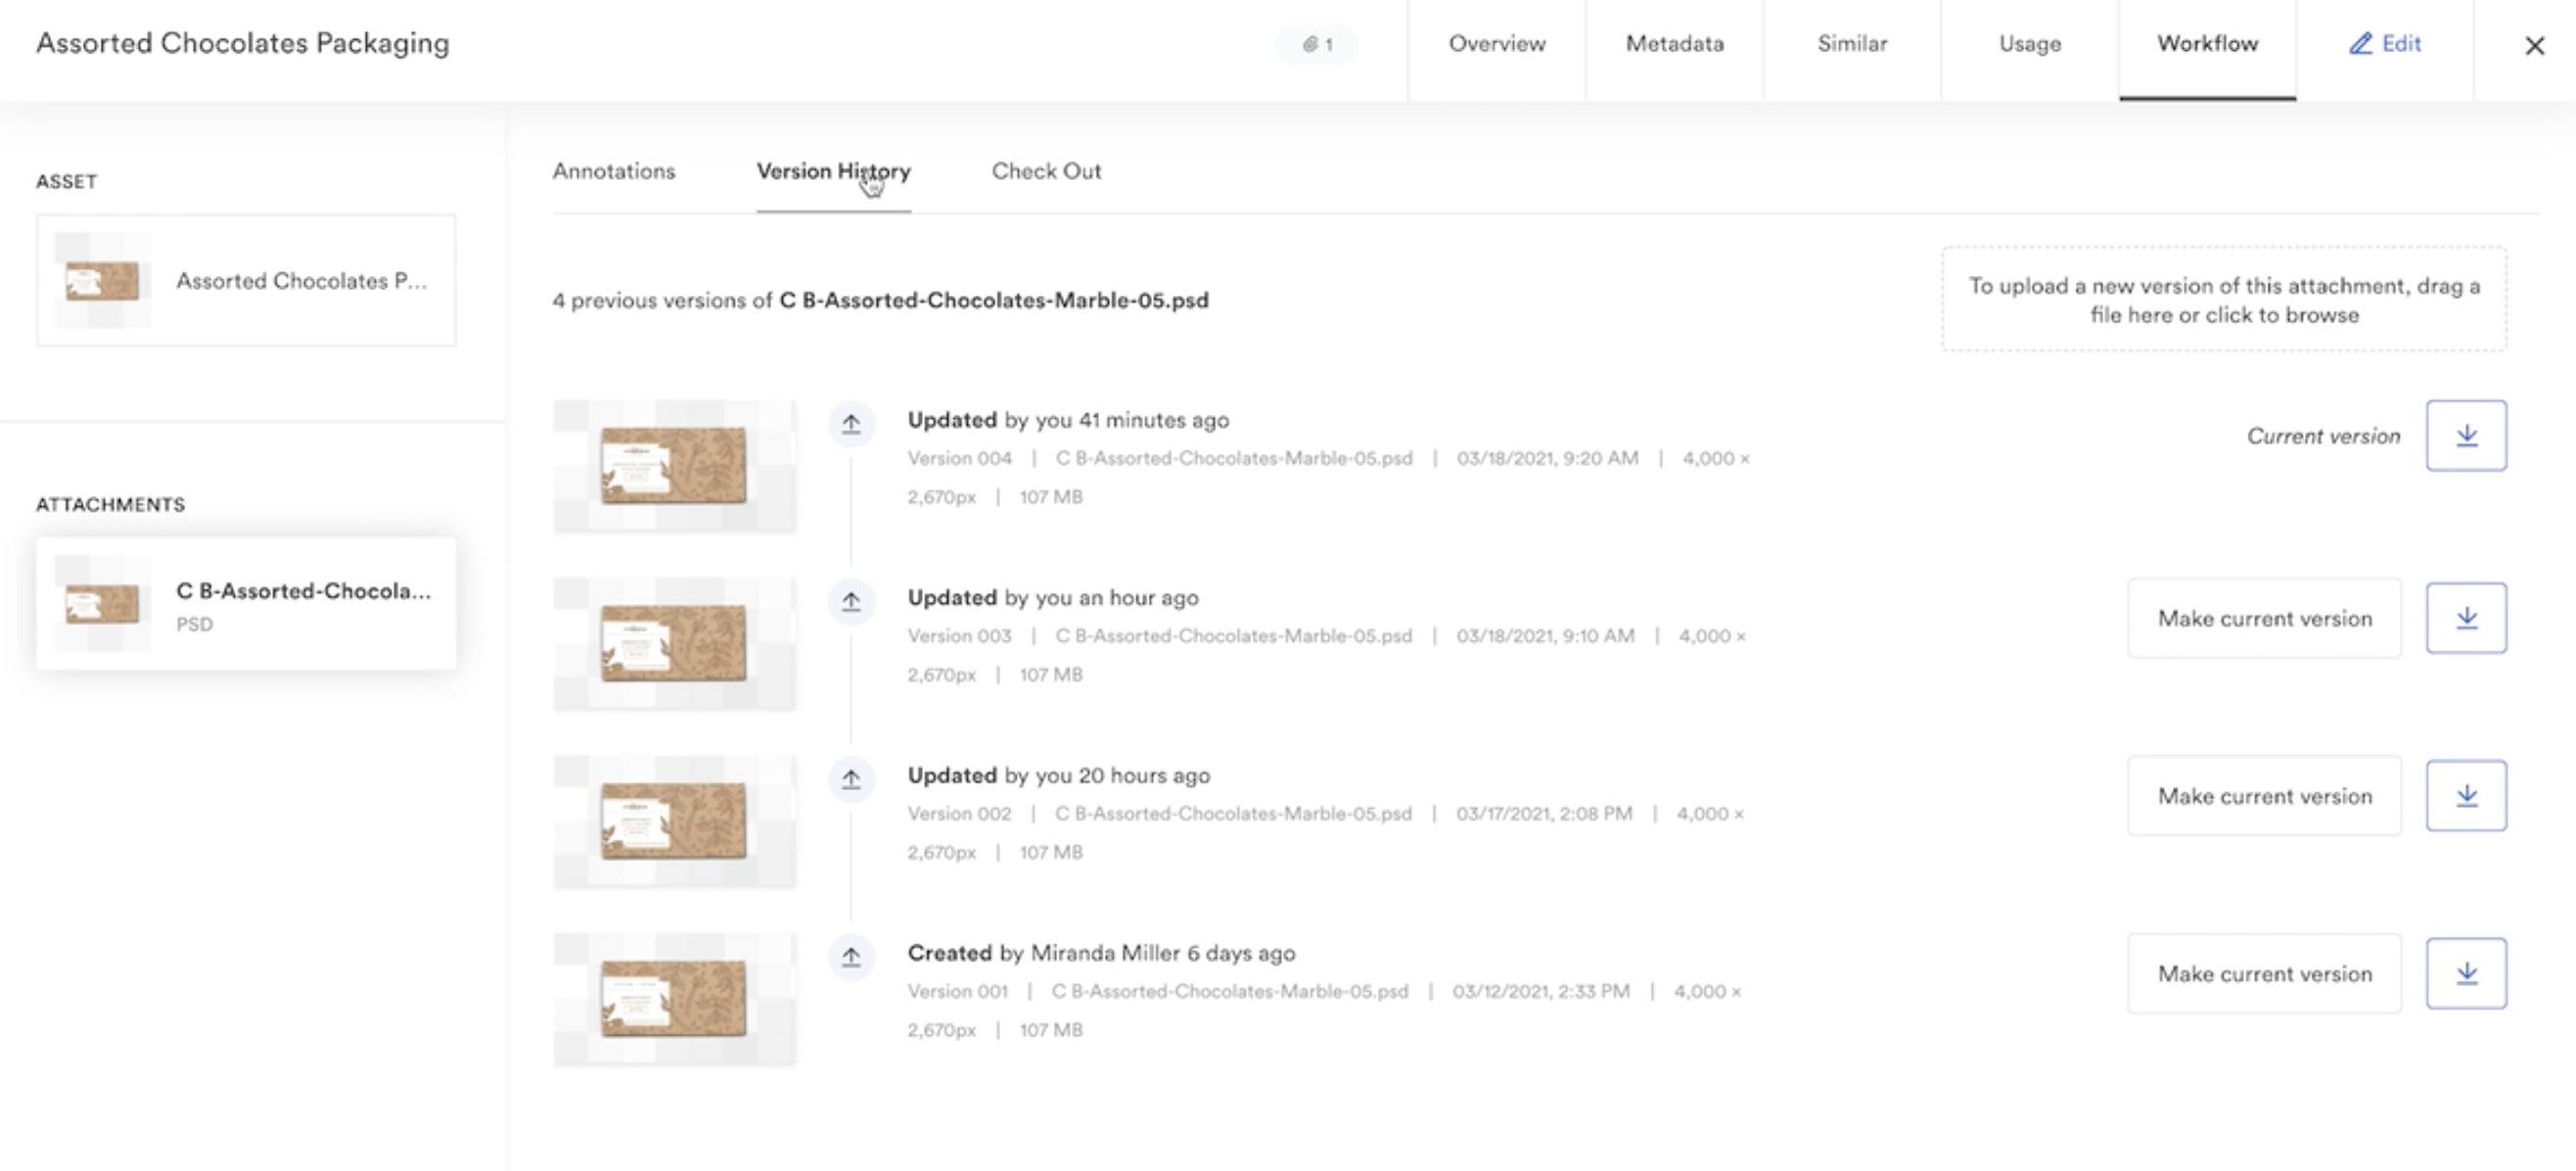
Within Version History, users can view when an asset was created and updated, who made any changes, when those changes were made and the asset type and size. To keep track of it all, each version is automatically assigned a number. This means there is always a trail of logical and clearly-labeled breadcrumbs for users to follow when navigating through past versions of a file.
Users can also restore and download past versions of the content within the Version History tab through the Make Current Version and Download buttons. The Make Current Version button allows users to update an old version of a file to the latest version. The Download button lets users download a past version of a file and edit it for their specific needs.
Thanks to the combination of Brandfolder’s Check-In/Out process and automated prompts, users can rest assured that all types of the same file are stored in one place. Translation: It is nearly impossible to have duplicate files scattered throughout your Brandfolder workspace!
Best of all? All files can be shared with internal or external parties by directly adding guest users from within the platform or by sending a share link. Because SharePoint is limited to internal use only, this makes Brandfolder a viable option for businesses that work with external partners, vendors or distributors.
What Brandfolder Can Do for You
Better version management isn’t the only benefit of Brandfolder. Our software serves as a single source of truth for all digital files. You can easily import, merge, edit, locate and access all your files without having to leave the platform.
And the best part is that Brandfolder allows users to manage and share all types of digital files with a variety of users. Not only does this save teams a lot of time, but it also improves file organization and ensures that your company maintains brand consistency across all assets.
Our platform is designed to deliver digital asset management solutions to marketing, creative and brand teams across multiple industries. From Healthcare to Professional Services, Agencies to Financial, Retail to CPG and more, Brandfolder serves a wide variety of niches with ease. And last but not least, our customer support and success teams offer high-touch support across multiple time zones. That means they’re ready to answer your questions and help you leverage our platform to its full potential.
Want to see how DAM improves version control? Request a demo.