- 1. Audit Existing Assets & Consider Your Current Organizational Structure
- 2. Organize Your Asset Library Around End-Users
- 3. Map Asset Metadata to Improve Search & Discovery
- 4. Put It Down On Paper & Begin DAM Set-Up
- 5. Optimize As Your Asset Library Evolves
- Start Building Your DAM Taxonomy with Our Team
Get branding tips and expert advice delivered straight to your inbox.

Digital asset management taxonomy is the structure in which you organize, categorize, and classify brand assets for end-users. It includes metadata and a controlled vocabulary of descriptive terms to define, tag, and search digital content.
We’re all familiar with the age-old folder/subfolder (“parent/child”) hierarchical structure — in file storage solutions like Google Drive, OneDrive, or SharePoint, or when saving files on your computer. It’s simple and straightforward, in theory… but anyone who’s tried managing content in this format knows how limiting it can be.
That’s why DAMs change things up: allowing users the flexibility to create a flat file taxonomy. This offers several benefits for admins managing assets and end-users who need to find and use content:
You have more control over the layout of your file library. Design your digital asset management taxonomy around unique user needs, content types, asset use cases, and more to improve browsability, findability, and discoverability. Users can browse your media library and see what’s available to them, find specific files, and discover new content that’s been added to the DAM.
Users don’t have to know the exact file location, name, or pathway to find content because the search functionality is powered by metadata, tags, categories, and filters (in the structure of your taxonomy). Users can search descriptive terms about assets, or phrases related to their projects, to locate exact files or see new content available to use in brand collateral.
Asset placement is also based on metadata rules; this allows you to store files in multiple locations without having to make (or hassle with) duplicate files. As a result, this improves file version control, collaboration, and brand consistency.
A strong file taxonomy also improves visibility in your asset library: admins can see what content is available to users and search through expired assets to keep a record of past content creation or repurpose existing collateral.
It improves the DAM platform's overall usability and effectiveness and allows you to optimize asset usage — users can interact with your content library without confusion, make the best use of (all) your brand’s available content, and work with brand assets more productively. No more buried content, messy folders, or duplicate files.
But creating a solid and logical DAM taxonomy is crucial to reaping those benefits. And although most brands with large content libraries already have some structure to organize files, weeding through existing files, cleaning up your storage drive, and re-mapping content (in the most strategic way) requires careful execution and knowledge of DAM best practices.
This is where Brandfolder helps: during migration, we provide ideas and feedback to tailor your file library around the end user groups who rely on and access the DAM system for content. Our DAM experts act as a second set of eyes to guide onboarding and keep you on the right track.
We also put together this guide with our recommendations to build a strong digital asset management taxonomy and successfully switch to DAM software.
Let’s run through the five steps to structure and maintain your brand’s digital asset management taxonomy:
- Audit your existing assets
- Organize assets for your DAM system
- Map asset metadata and tags
- Review and finalize your asset taxonomy
- Make updates as your asset library grows
Want to move to DAM software? Schedule a free demo with our team to discuss your requirements and see how Brandfolder DAM helps you organize and strategically use your brand’s digital assets.
1. Audit Existing Assets & Consider Your Current Organizational Structure
What’s the state of your storage drive?
The first step to creating a digital asset management taxonomy is to look at your existing assets. Is your current storage solution neatly organized? Are folders mapped logically? Can you easily find assets when searching?
In most cases, these answers are “No.” Many teams come to us with a disorganized storage drive: assets living in multiple places, outdated and duplicate assets, and an unclear folder structure.
However, these file storage drives didn’t start messy, so we advise teams to think back to the folder structure they had initially envisioned. How were assets originally organized? Do you need to clean up your drive with the folder structure you mapped out in the past (and optimize the old structure to accommodate new assets)? Or are you looking at a complete overhaul?
Once you decide where to begin, audit your brand’s asset library to perform a clean-up and start thinking of ways to reorganize:
- Take note of duplicate assets, where they live, and if they need to be deleted or merged with an updated file.
- Update file names and determine whether your assets follow strict file naming conventions.
- Delete or archive old content you no longer want or need.
After you wrap up your review, you can start mapping out your asset library.
2. Organize Your Asset Library Around End-Users
What makes sense to your teams & stakeholders?
When mapping your taxonomy design, don’t just aim for a “clean-looking DAM” — consider both the type of content you have to organize and the user experience (i.e., how end-users will navigate your DAM solution and find the assets they need).
Ask yourself: How do your teams search for content in your existing drive? What type of content do they need? If you were the one searching for this collateral, how would you prefer to browse?
It’s also a good idea to interview teammates or partners who use your existing storage drive to learn more about how they search for files. You can ask how they would search for specific types of content, dig into the pains they experience, learn about commonly-used search terms, and more. These insights can help you develop metadata, tags, and filters around user preferences.
If assets are too hard to find or your DAM is a headache to navigate (even if it looks “clean”), team members will be less inclined to use brand collateral.
On the other hand, mapping an intuitive asset library enables self-service. All users can come into your Brandfolder and pull content for their unique projects without asking anyone for help. This eases the burden on your creative team to respond to asset requests and review digital projects, letting everyone work more efficiently.
Now, because the way you organize assets depends highly on your industry, the type of content that you have, and your teams’ use cases, we can’t spell out one specific way to map your asset library. However, we often see teams organize assets by:
- Brand — in top-level Brandfolders
- Collections (within Brandfolders) — Product line, service, content type, sales or marketing campaign, season, or use case
- Brand Portals — End-user groups (i.e., specific teams or departments, agency partners, retailers, manufacturers, etc.)
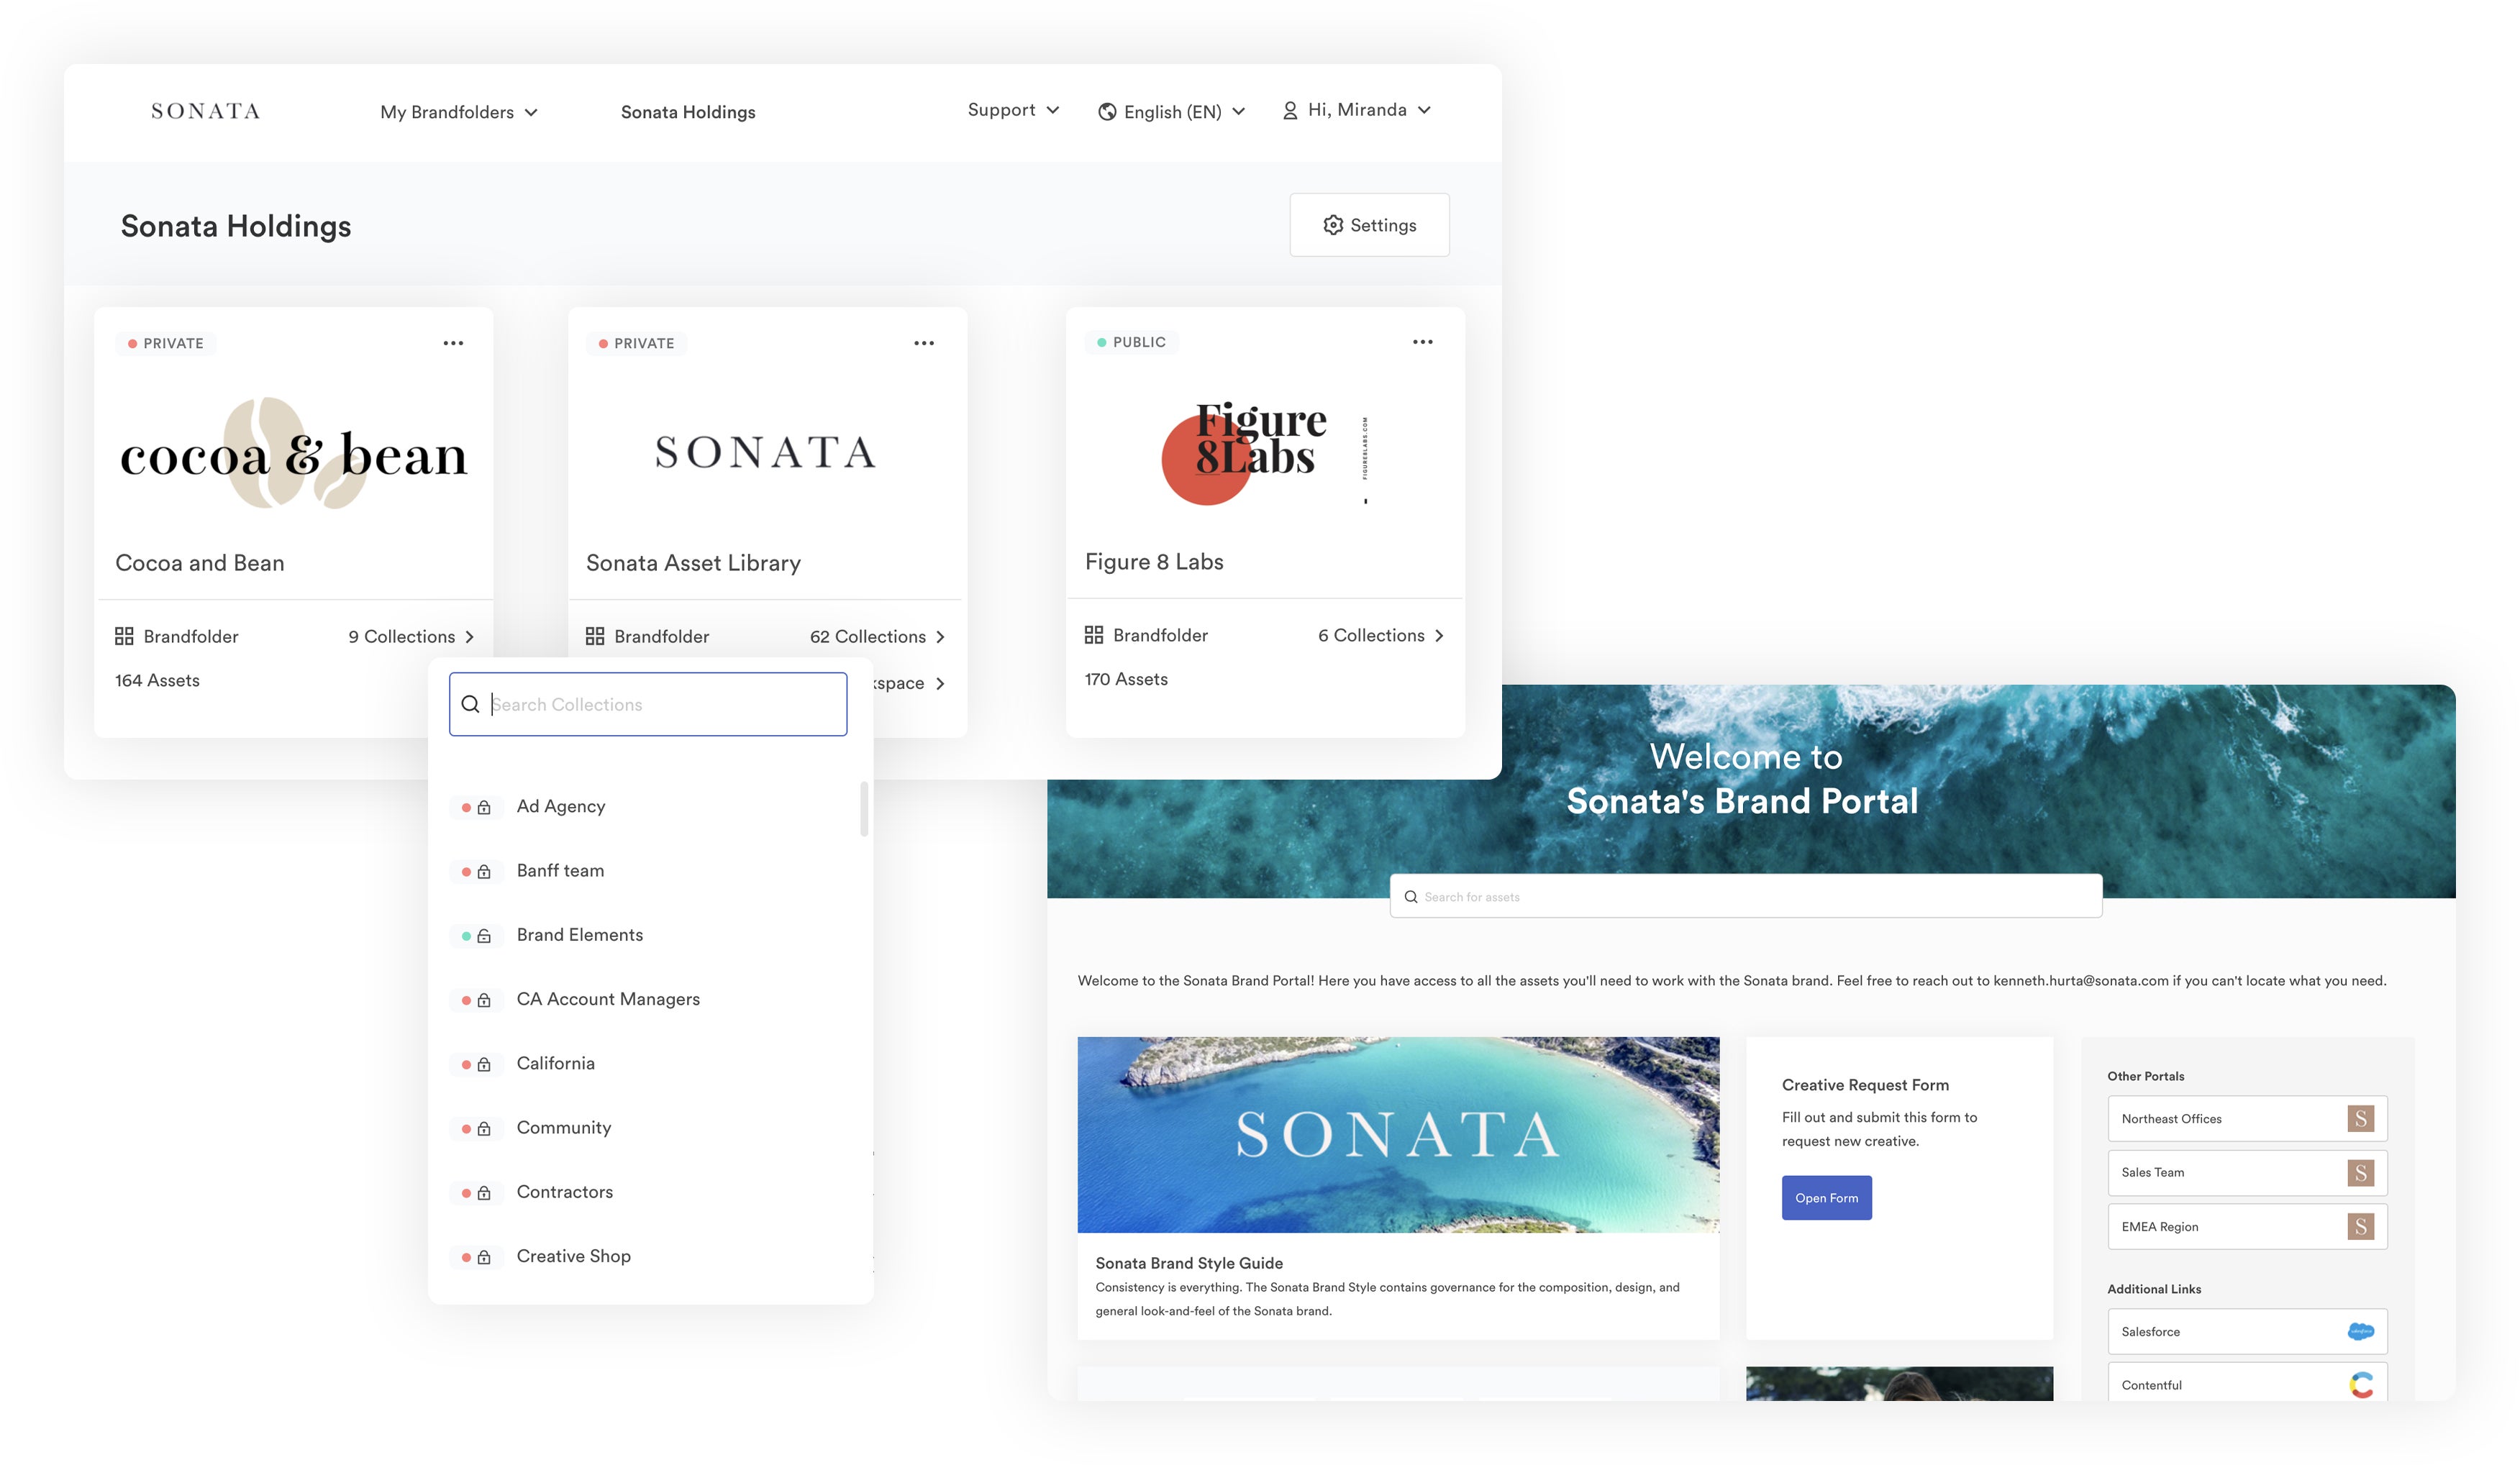
As we mentioned earlier: what’s nice about Brandfolder’s flat taxonomy is that assets can live in multiple places, so you don’t have to create duplicates of your files if you want to store them in two different Collections or Portals. Then, everyone works off the same source file, regardless of how or where they found it.
In Summary: Flat vs. Classic Folder Structure
- In a flat taxonomy, assets can live in multiple places. In a nested folder structure, you have to create duplicates if you want to store assets in different folders.
- Flat taxonomy creates a visual plane and allows you to preview assets as you scroll. In a nested folder structure, you only see small thumbnails and have to open them to view.
- Flat taxonomy allows for faster and more efficient searching. In a nested folder structure, you have to dig through folders and subfolders and search by file name to find assets.
Here’s an example of how one enterprise personal care company maps its asset library:
- Separate Brandfolders for each business they own
- Collections within those Brandfolders to: organize branded elements in one spot (e.g., logos, colors, fonts, etc.) and divvy assets by product line (including product imagery, technical spec sheets, marketing materials, and sales collateral)
- Brand Portals with the relevant materials each retailer/distributor needs to sell their products and represent their brand
Then, this company leverages Brandfolder’s PIM integration and custom fields to store essential product information with relevant assets — this keeps Collections clean and guarantees end-users who access product-specific collateral can also find important details about each offering.
You can learn more about DAM and PIM integrations here: DAM vs. PIM: Core Differences & How to Use the Two in Tandem
Our example brand also uses the same organization and custom fields across Brandfolders, so anyone who interfaces with more than one of their brands can toggle between libraries without learning different folder structures. This also makes it easier for admins to manage their DAM taxonomy in the long-term.
Remember: Our team is available to help build your asset library and organize content. Brandfolder accepts hundreds of file types, so you can centralize brand assets in an easily-searchable digital asset management system and maintain your files' organization.
You can read more about mapping your asset library in our other guide: How to Organize Digital Assets for Easy Sharing, Search & Use
3. Map Asset Metadata to Improve Search & Discovery
What information will you use to categorize and filter files?
Once you know how to organize your brand assets, the next step is to plan metadata (aka data that describes and provides fine details about your brand assets).
There are a few steps to this:
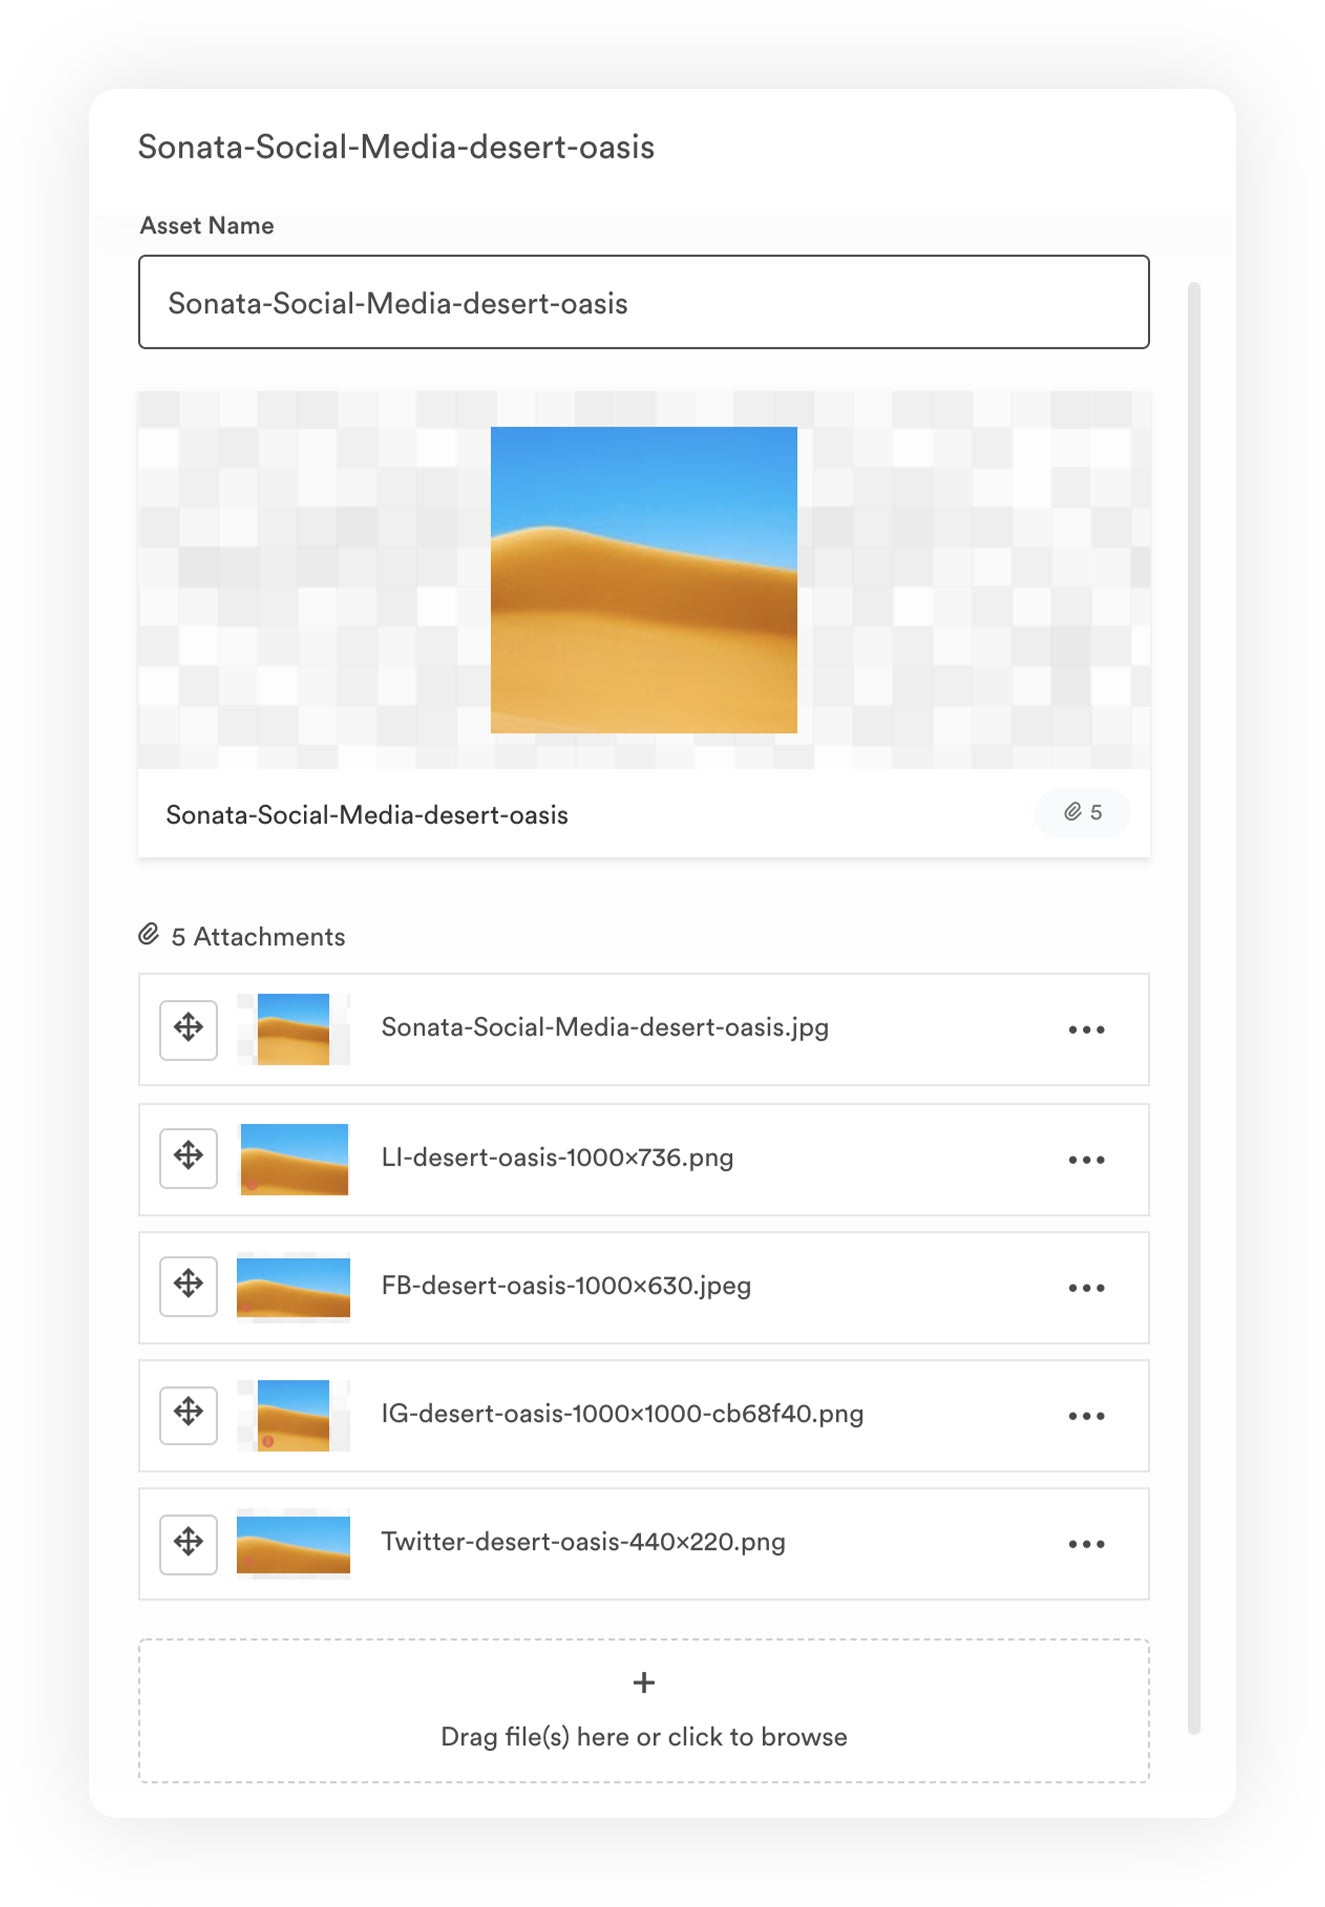
1. What types of assets are you storing? Write down all of the types of assets you have in your library — think images, videos, PDFs, templates, GIFs, logos, fonts, etc. This categorization will help us create Sections.

Sections appear at the top of every Collection or Portal to display the type of collateral stored within. As you switch between Collections, Sections will change to reflect what’s available to users. If you only have product images and templates for a certain Collection, then the only sections displayed will be Images and Templates.
2. What type of information do you want to keep track of with your assets? Add custom fields for different types of content.
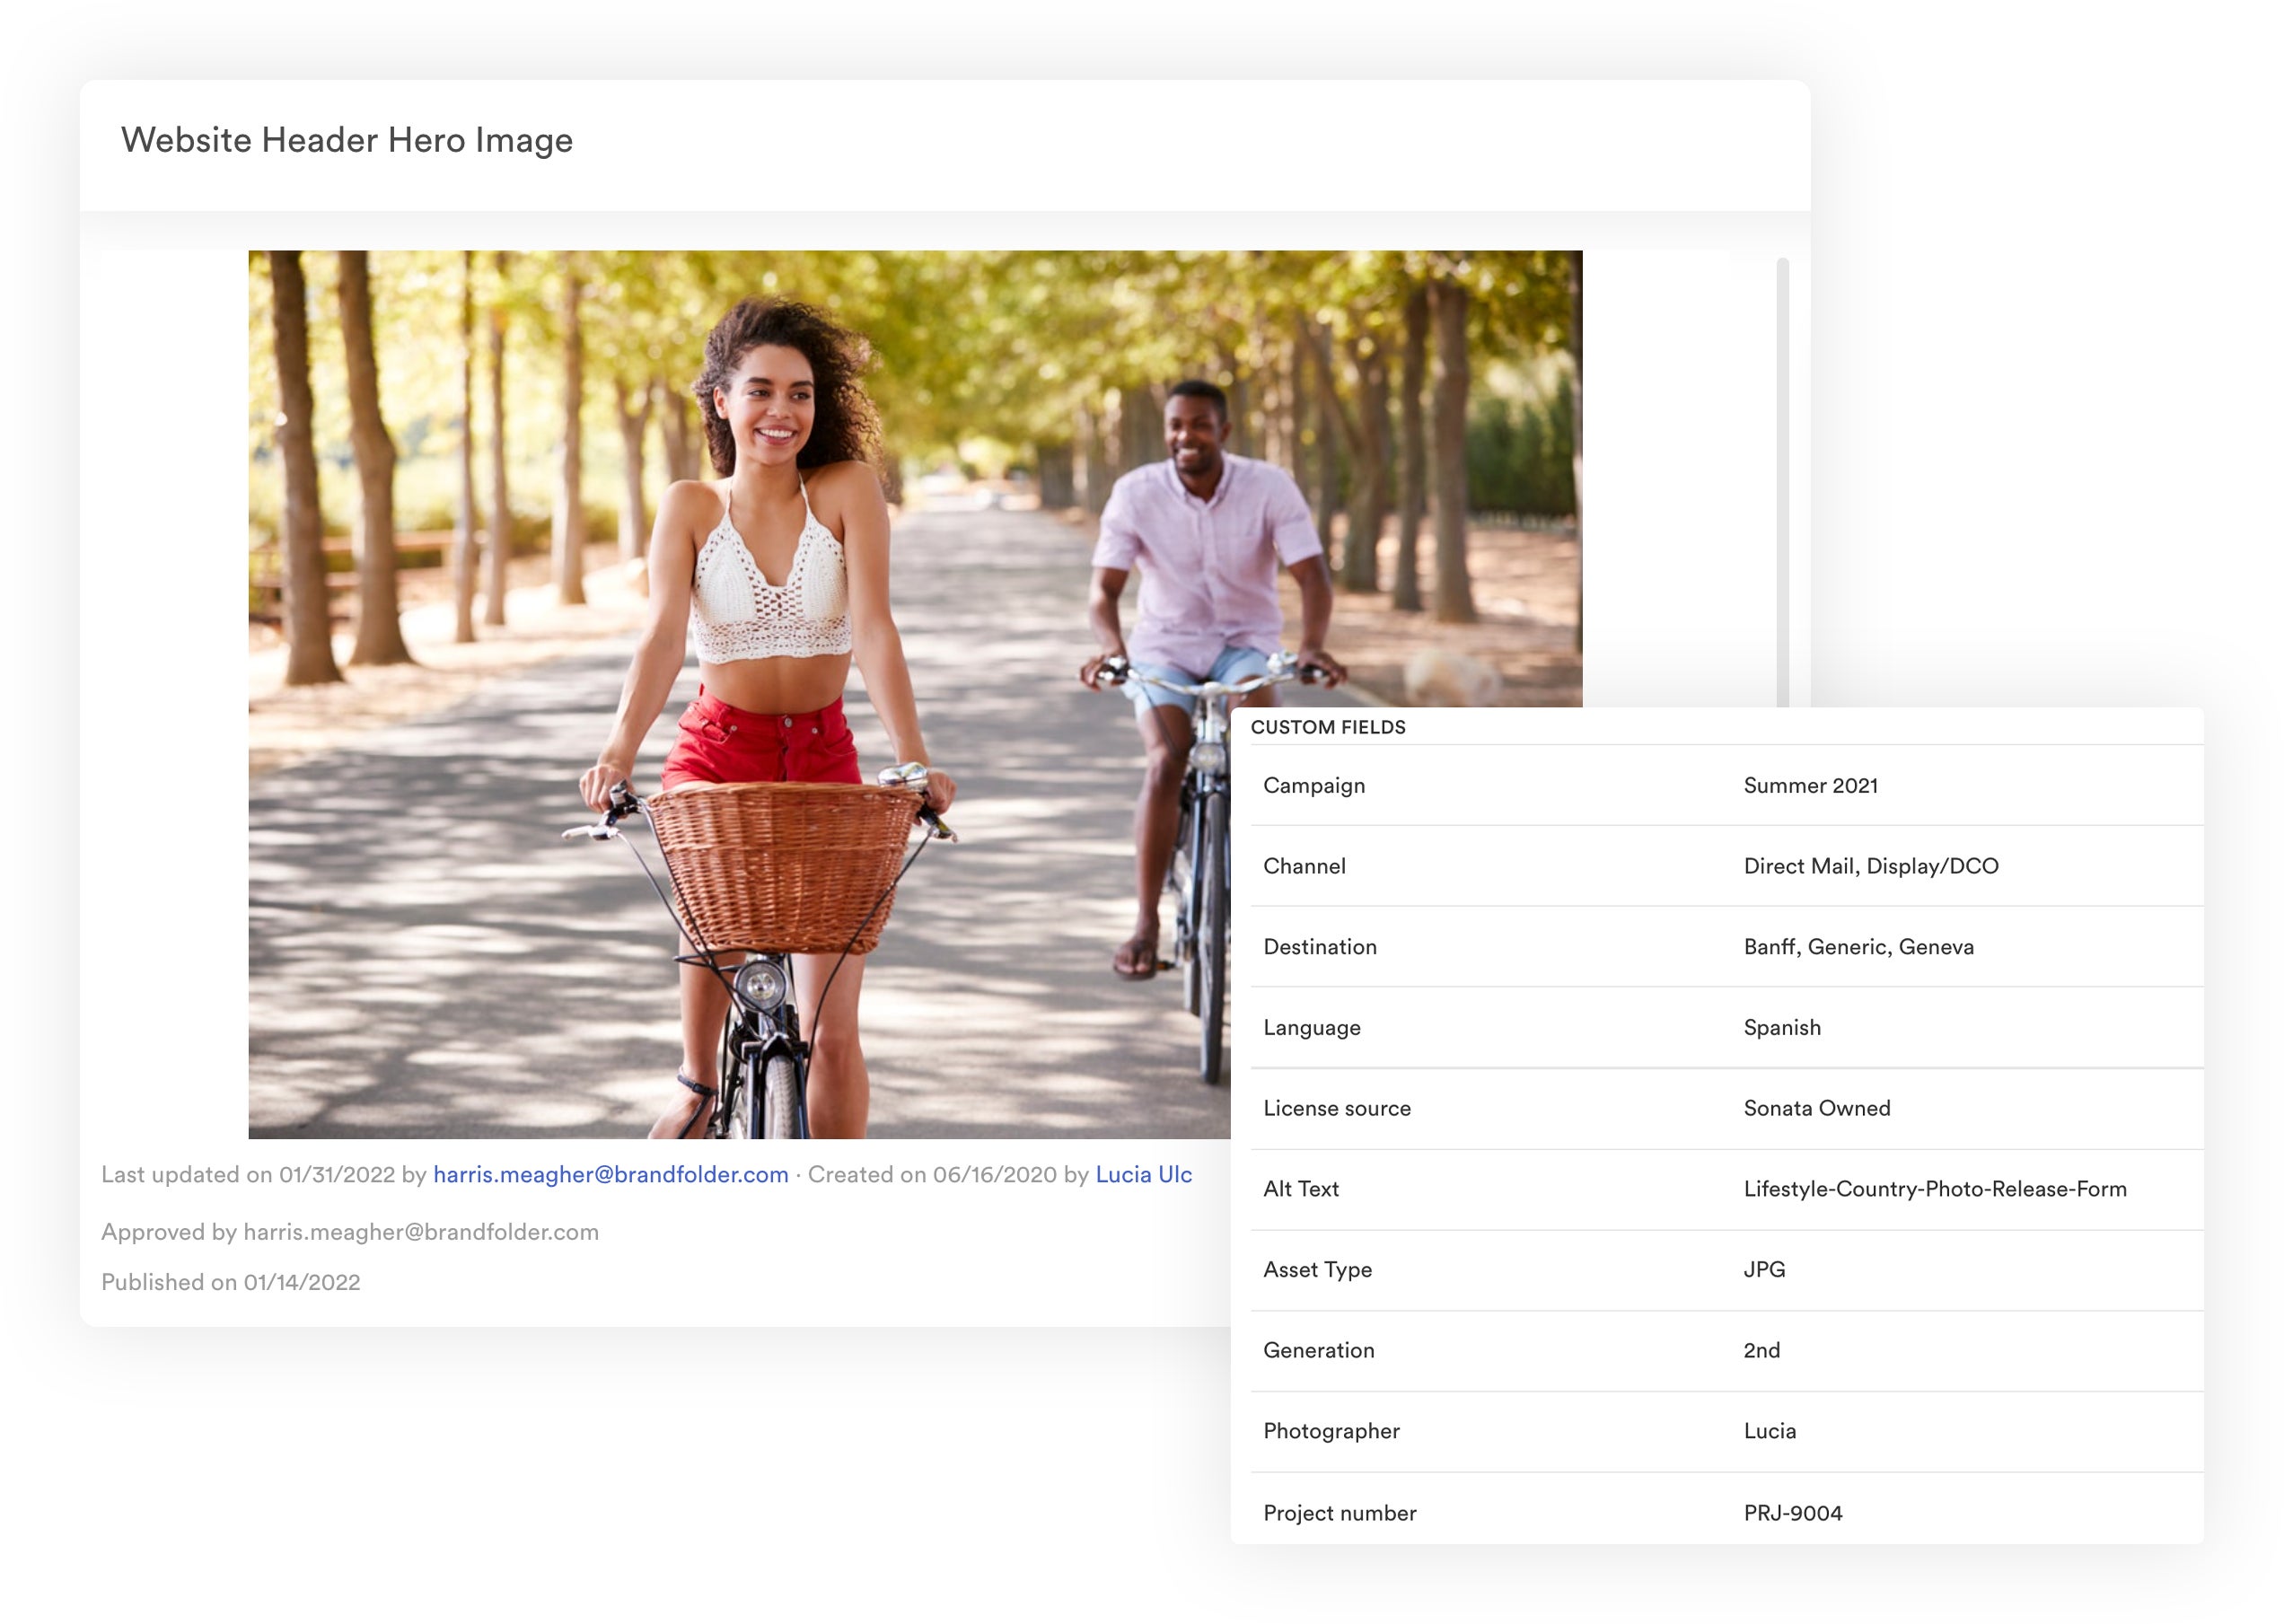
This lets you classify data and create a controlled vocabulary for clearer organization and faster search. It also lets you store all relevant information about an asset in your DAM system. It’s important to remember that your custom fields will translate into the filters you use to search; think about the end-user again here as you plan custom fields for different asset types.
We suggest keeping custom fields relatively consistent so users can navigate different sectors of your organization’s Brandfolder and use the same phrases to filter and search.
3. Consider if you need to input any additional data about your assets for more granular reporting and search capabilities. You can add Labels to complement your Custom Fields if necessary.
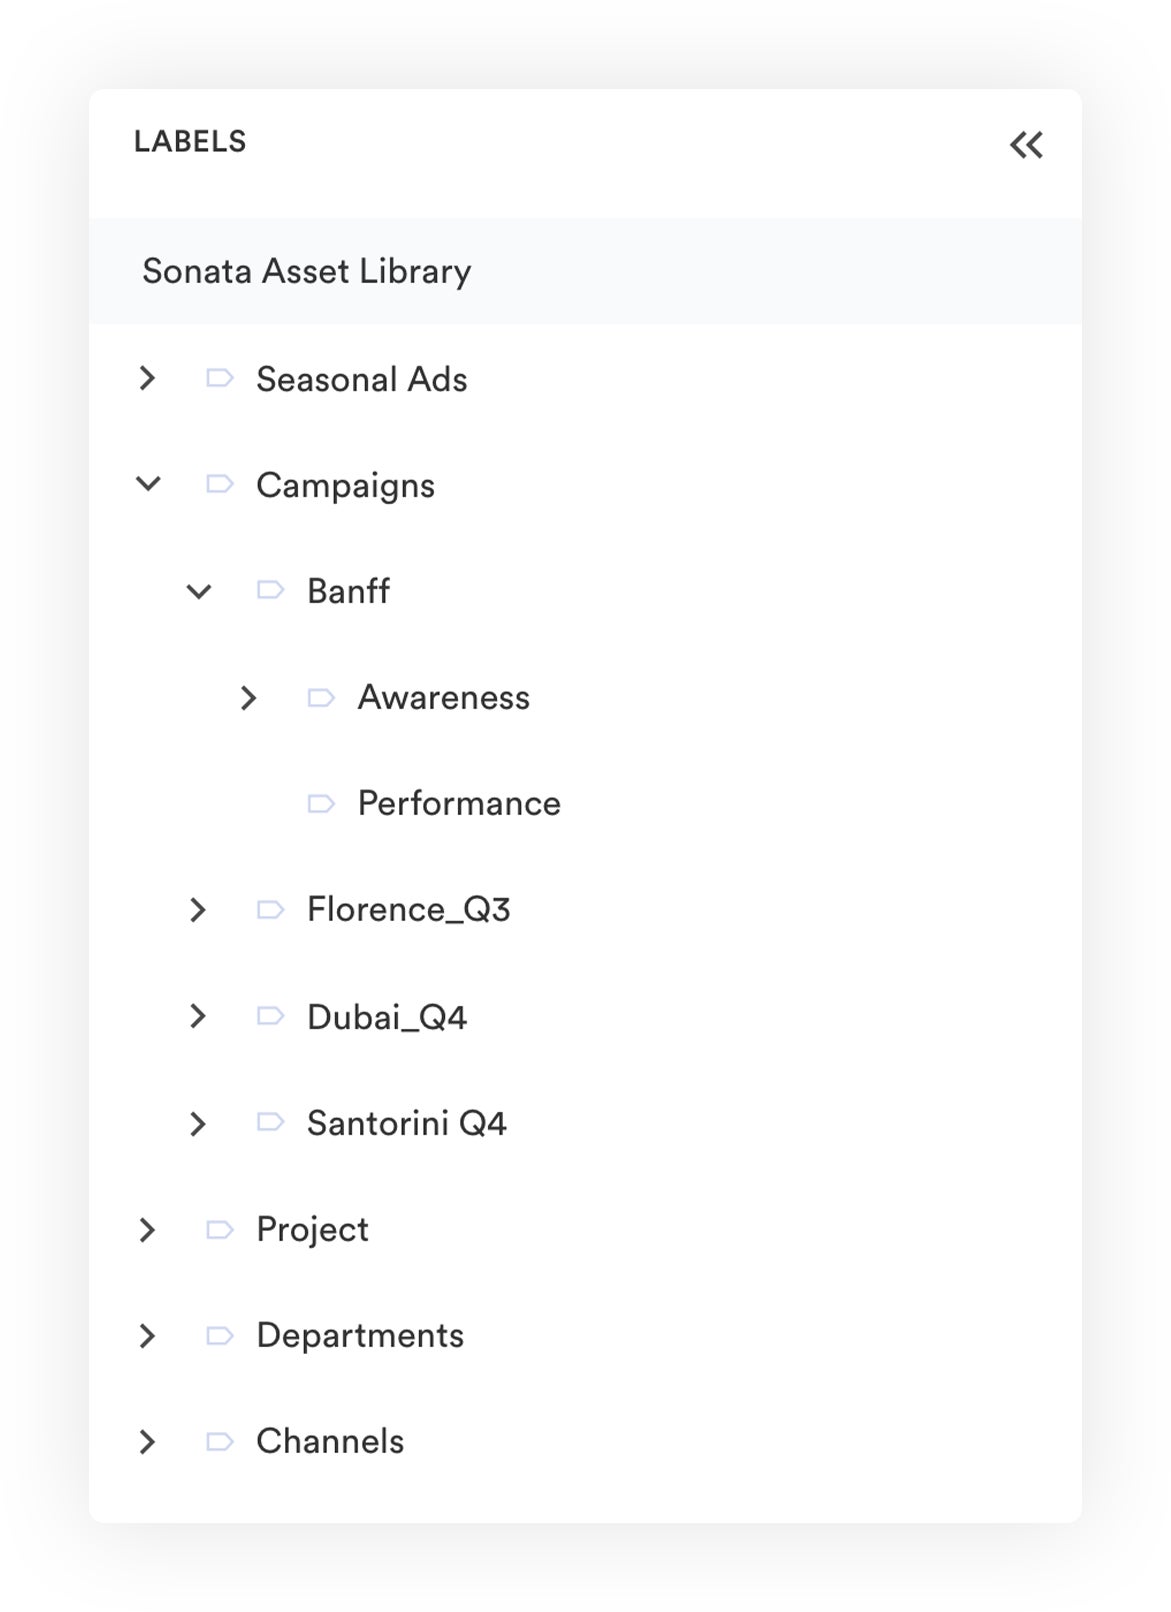
We recommend using labels when storing sub-information about a specific data point in your custom fields — labels translate into subcategories as you filter your search. For example, say one of your custom fields is Region, and the input value is North America. You could create labels for Canada, Mexico, and the United States to include more specific information about the region.
After you decide on the type of metadata and custom fields you want to store in Brandfolder, we can create automation rules to place assets in the right location(s) during import. Then our AI automatically adds metadata and tags to content so all critical information is stored with files (without manual entry).
Read more: Why You Need Automated Metadata Tagging in Your DAM
4. Put It Down On Paper & Begin DAM Set-Up
Give your taxonomy a final look and make any additional tweaks.
Does the organization of your assets make sense? Did you include all of the relevant metadata for your brand content?
Since our team assists with the entire process outlined above, we rarely decide to do any major reworking at this step, but it’s always good practice to make sure we haven’t overlooked anything before beginning ingestion.
Once your taxonomy structure has the green light, we can move content into your DAM. We configure Brandfolder with your asset map and metadata information to automate uploading: as content is pushed into Brandfolder, Brand Intelligence automatically organizes assets, assigns metadata and tags, and detects dupes.
See how Brandfolder’s AI makes life easier by fueling asset organization and findability:
We plan this part of the process with you, too: some teams can push all assets over at once. But brands with bigger asset libraries typically move assets over in phases. In these cases, we prioritize the content your teams use most frequently and push assets to Brandfolder in bulk, then we make a schedule to upload what’s left over.
Read more: Digital Asset Management Strategy: 10-Step Checklist
5. Optimize As Your Asset Library Evolves
Adjust as you go to keep your DAM working for you.
Brandfolder has features like duplicate asset detection, asset expirations, and user permissions to keep your asset library clean and prevent users from going rogue, adding, editing, or deleting content they shouldn’t.
As a result, you don’t necessarily have to perform regular clean-ups in your DAM. However, we do suggest revisiting your DAM’s structure as your brand grows and evolves to make sure it’s still optimized for your users.
When doing this review, consider any new teams or partners who access assets and new types of digital assets your teams use. Is everything still laid out in the best way?
Also, consider user feedback — you can conduct another round of interviews to learn what users like about the DAM and any challenges they have. Then leverage those findings to guide DAM optimization. You can also use Brandfolder’s reporting feature to see the specific terms users search to find content; by understanding user habits, you can employ strategies to make content more discoverable.
It’s easy to edit your Brandfolder library when you want to change the organization or modify custom fields — and you can use bulk functionality to automate edits across the entire DAM system. But as always, our team can provide guidance when adjustments are needed.
Start Building Your DAM Taxonomy with Our Team
There’s no way to organize your DAM. Even though taxonomies across organizations may have some similarities, they’re customized to each organization. By following these steps, you can assemble a well-built taxonomy that fits your organization and end-users.
Brandfolder is rated one of the best digital asset management software because our platform is highly customizable, and we don’t believe in the “one-size-fits-all” approach to asset storage. Plus, our customer experience team is consistently mentioned in Brandfolder reviews because our hands-on support ensures all of the organizations that sign on with us can personalize Brandfolder for their teams and workflows.
To learn more about building your DAM taxonomy and getting started in Brandfolder, sign up for a free demo and consultation with our team.
You can also read our other guides about getting started in DAM here: